Starting in Stock Photography

This weekend I commented on an interesting post in a Facebook group. This led to a series of private messages asking me about starting in stock photography. While earlier posts on Beyond Here have covered elements of stock photography, I haven’t written a post for people considering getting started. So here it is – starting in stock photography.

First, let me tell you about the Facebook group. I am not a big Facebook user – you can find me at Craig Dingle Photography Pty Ltd – but have recently joined a forum called Aussie Photography. It is very impressive for the quality of images posted, but more for the positive environment created by the members. It must be very well moderated to achieve such a positive, helpful group. I encourage you to check it out, whether or not you live in Australia.


In that group I commented on a post where the member was inquiring about how to deal with issues associated with client cancellations. The photographer was doing 5-7 shoots per week but seemed to be struggling with cash flow. I suggested stock as one way to generate a steady cashflow. That lead to a wave of private mail messages. They were mainly asking for more detail about stock photography and how to get started.

Volunteer

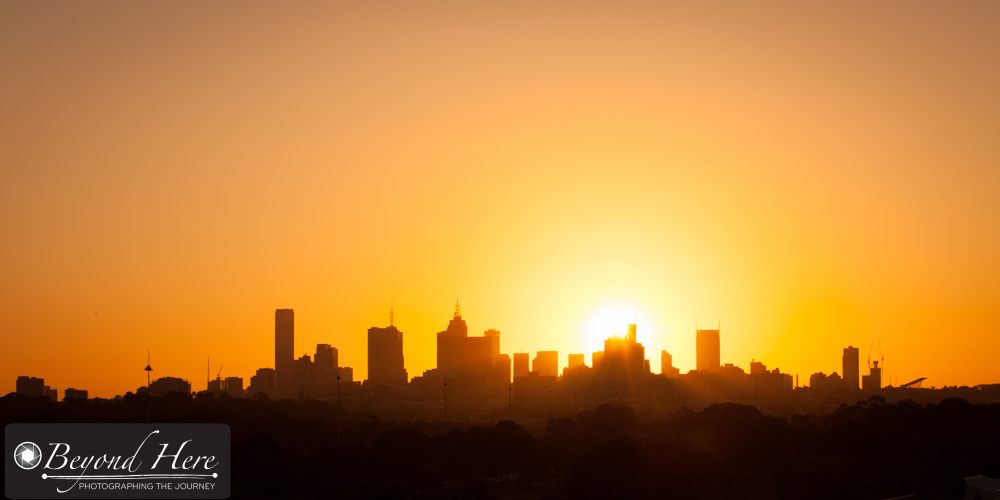
Simple concepts can do very well as stock images

How Does Stock Photography Work?

Stock photography works on the principal that it will be easier and more cost effective to buy an existing image than to get a photographer to shoot a new one. For example, if you need an image of a koala, you can buy one for less than $20. That is going to be cheaper and quicker than getting a photographer to shoot a new image for you.

From the photographers point of view, the stock photography model works on the basis of generating a high number of downloads (sales) for a relatively small amount per download. And again, in the case of the koala image, the photographer uploads the image to the stock photography site, and that image can be downloaded by multiple buyers. I have images dating back to 2008 in my stock portfolio. It seems amazing that images taken back then are still generating an income for me.

Micro Stock Photography

A significant income is possible through stock photography

How Much Income is Possible?

This was the most common question I received after the Facebook post. Of course, the answer is – the sky is the limit. There are people generating hundreds of thousands of dollars per annum via stock photography. They are in the minority. But it is a pity that most of the people I swapped messages with today had a view that you couldn’t make real money in stock photography. It is possible to make a significant income, but it will start out small, and it will require persistence. I have uploaded over 1000 images per year for 6 years now. I am not in the top echelon of stock photographers, but have generated an income well in excess of 5 figures per annum for the last 3 years. I expect to be able to maintain that level, as outlined in this post.

What Type of Images are Popular?

This was the second most asked question after my Facebook post. It is not an easy one to answer. If you look on a stock photography site, you can search nearly any subject and find images with hundreds of downloads. Try, diced tomatoes, for some really well lit and successful stock images. Pick another obscure subject and you will find the same.

That said, if you can shoot images with a clear theme they have a good chance to be downloaded. Again, search a stock site for ‘global warming’, or ‘workplace bullying’ or just ‘bullying’. You will find clearly themed, well executed images which have been downloaded many, many times. Nice.

What if you don’t want to shoot images like those? Well, study the type of images you do like to shoot, and see what sells. I can tell you in advance that simple, plain, uneventful landscapes will not be popular. There are just too many of them. But, if you have landscapes that are very well lit, or contain iconic content (like the Sydney Opera House), they have a good chance to do well. (The Sydney Opera House can only be used in editorial images – I will explain that in another post).

Sydney Opera House

Sydney Opera House

When people are starting in stock photography – I encourage them to shoot the type of images they like. If they are wildlife shooters – shoot wildlife. If you like shooting architecture, shoot architecture. Got the idea? As your skill level and success grow you will find other areas of interest that have a market.

What’s My Story?

I got started in stock photography in 2008. At that time, I wasn’t very successful but I could see the power of being able to shoot an image once, and have it downloaded for years afterwards. In many ways, stock photography is a form of passive income. Make the effort to shoot the image once, and get paid multiple times.

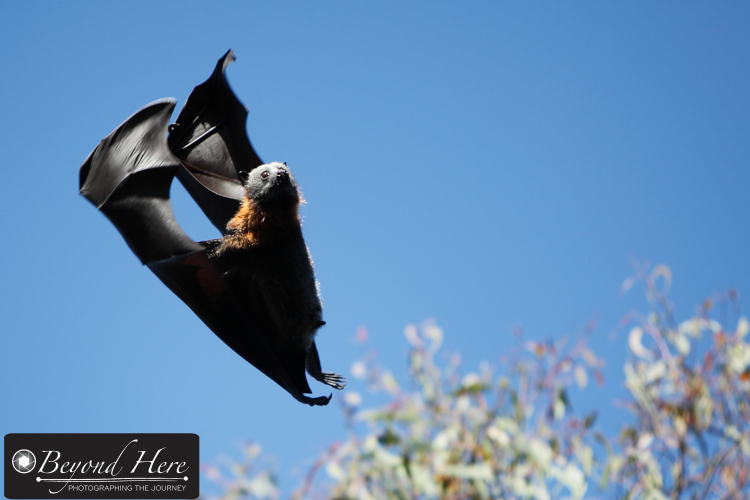
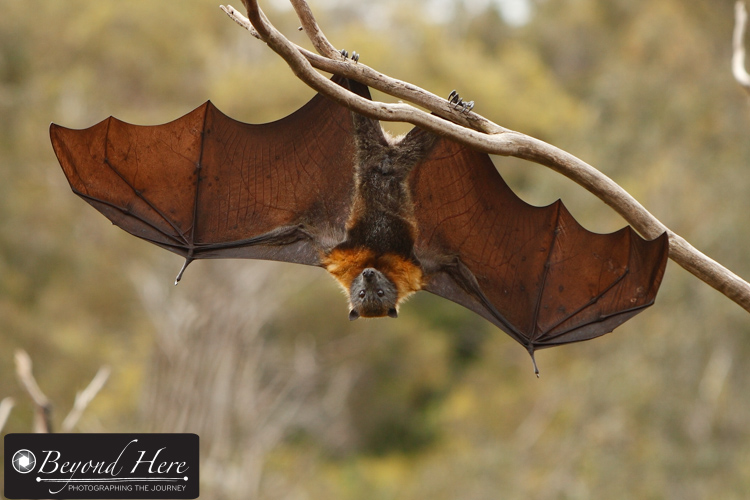
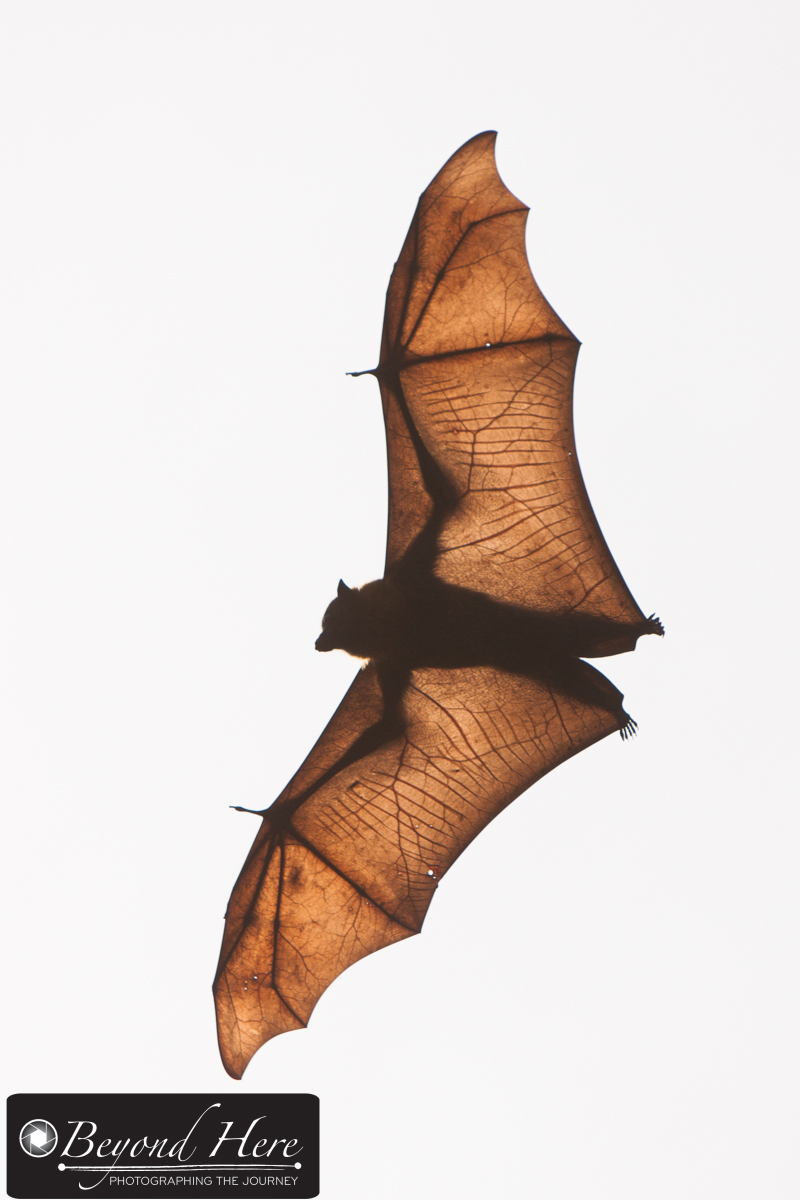
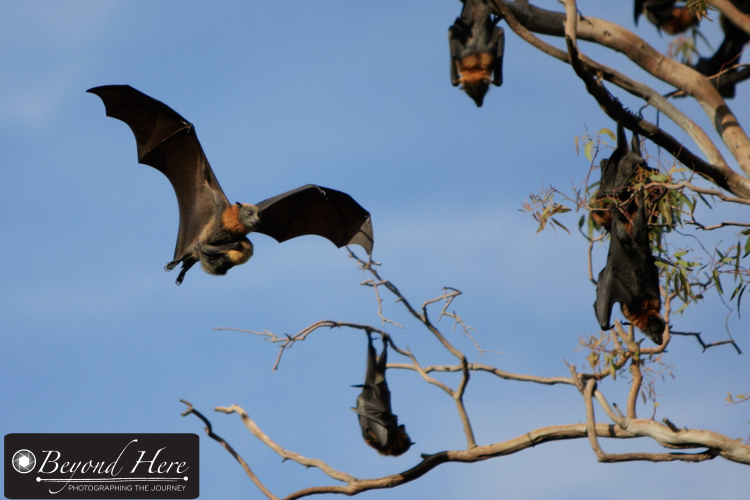
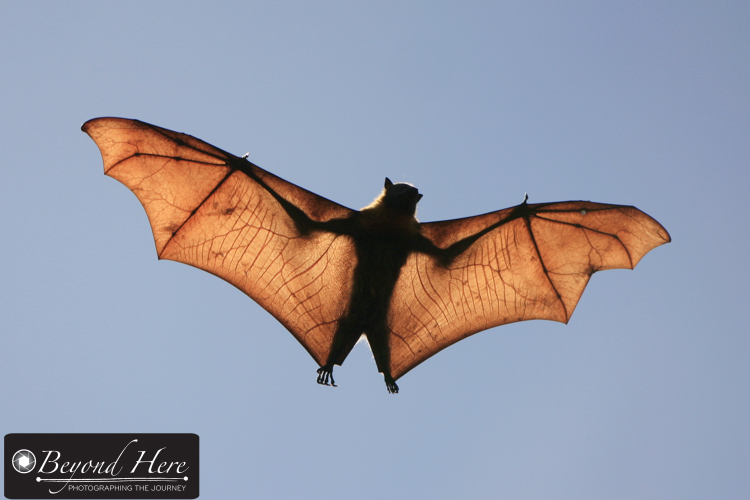
Like many stock photographers, it took me a long time to come to grips with the quality standards and to understand what types of images would sell. I like to shoot wildlife and first came across some success when shooting images of flying foxes. They are popular in the lead up to Halloween each year. While it is a fairly small market, I was able to do well by shooting a wide range of flying fox images and uploading them in the weeks before Halloween. At that time, there wasn’t much competition either – that has changed now.

Halloween

I have been successful with Flying Fox images at Halloween

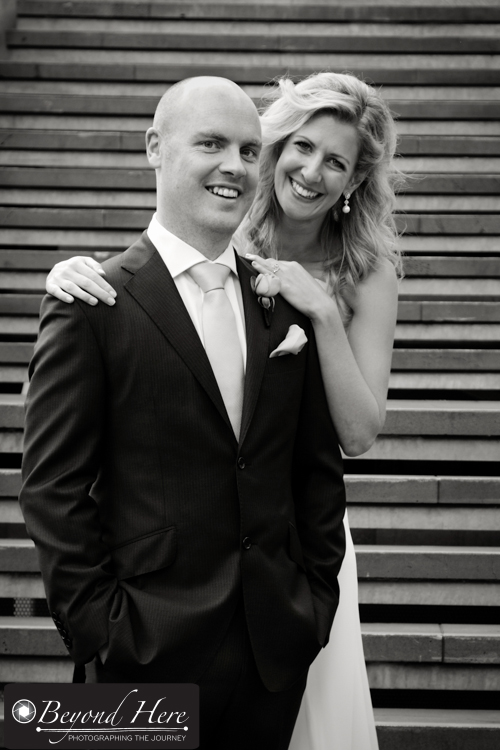
Today I have over 6000 images available to be downloaded. My most successful files are of people doing something and with a clear theme. (I still shoot and upload wildlife images, mainly because I like to).

What Stock Sites Should You Consider?

There are a growing number of stock sites where you can upload your work. But I would suggest starting in stock photography with the largest and best known sites because they have the most buyers. I suggest Shutterstock, Dreamstime, and iStockphoto. (You can find a link to iStockphoto on the right hand side on each page of this blog).

Each of these sites have millions of files available. Do a search on a topic that interests you. What is there? How can you add different files? Is there something to learn from the files which are successful?

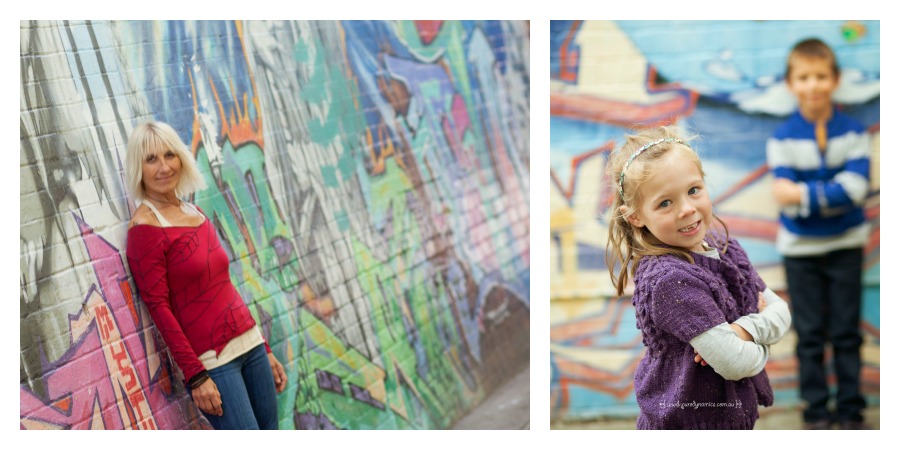
What About Model Releases?

Where ever a stock image contains recognizable people, it will require a model release to be accepted by the stock library. A model release is a document that provides permission to use the person’s image. Model release templates are available from all the major stock photography sites. You simply download, complete, sign, and upload the release with your image. They are not hard – and once you are familiar with them they are straightforward.

Is Stock Photography Easy?

Starting in stock photography is easy. You just go to a stock photography site and open an account. Try, you will have it done in just a few minutes. But succeeding in stock photography is not easy. There is lots of competition and you need a large number of downloads to generate a meaningful income. That generally means you need a large number of files, and that takes time, skill, and persistence.

Can Anyone do It?

I believe anyone can succeed in stock photography (I can hear people criticizing that statement already!) One thing all successful stock photographers have in common is persistence. They research image concepts, shoot quality images, and repeat the process. They keep at it. Over time they build a large and diversified portfolio. They don’t give up. Persistence is the key.

Where to From Here?

I’ve tried to keep this post simple. If you have questions, please add a comment to this post. I will do my best to answer them for you. If you would like to receive a weekly update of popular posts on Beyond Here, please go to the top right of this page and sign up.

Give Me More!

If you are ready to get cracking, consider this ebook called Build a Five Figure Income in Your Spare Time through microstock photography. It is available to download for $5.

Thanks for reading this post. I wish you success as you are starting in stock photography!!

My Home Town Favorites

Today’s post is about some of my home town favorites – special places in Melbourne, Australia that offer great opportunities for a photographer. Melbourne is a super place to live with lots of very good photography spots. It was hard to limit it to 5 places – but maybe I’ll write another post with another 5 one day. So, where are my home town favorites?

Melbourne is known for hosting great sporting events (among other things!) There is:

  • Melbourne Cricket Ground which hosts cricket test matches and AFL football
  • Etihad Stadium which hosts AFL football, and occasional soccer, rugby, rugby league games
  • Rod Laver Arena which hosts the Australian Open Tennis tournament every January, and
  • Albert Park Lake which the Australian Grand Prix races around

But none of those places have made this list of my home town favorites. So what has made the list?

Brighton Beach. Brighton is a well known suburb next to the beach in the city’s south east. It is well known for the colorful bathing boxes along the beach. They are great to photograph particularly at sunrise and sunset. They can also look great during a storm. As well as the bathing boxes, the beach provides great photo opportunities. I particularly like sunset in the summer time. Low tide can mean great silhouettes of people walking on the beach with the sun setting behind them.

Brighton Beach

Brighton Beach. Summer, sunset.

Yarra Bend Park. This large park area is just 4 kilometers from the city center. It is an extensive area which includes picnic areas, walking tracks, and a golf course. There is a road through the park area, and car parking available. At one spot, there are great views back to the city. On most evenings in the summer you will find people have stopped to see sunsets like this.

Melbourne

Melbourne cityscape taken from Yarra Bend Park

Yarra Bend Park. Yes, Yarra Bend Park again! It is a big park area. On one side are views of the city, and in another area is the Yarra River. Here you can see these spectacular flying foxes. There is a very large colony of them. This place featured in a previous post called Favorite Wildlife Photography Locations.

Yarra Bend Park

There is a large colony of grey headed flying foxes in Yarra Bend Park

City walks along the Yarra River. The Southbank area next to the Yarra River is a great place to shop, walk, and eat. There are a large range of good restaurants, coffee shops and places to relax near the river. For the photographer, there are also great views of the city buildings. Take a walk anywhere from South Wharf right through to the Melbourne Cricket Ground. Both sides of the river provide great views, with several bridges to go across when you are ready.

Melbourne

Melbourne city from Southbank

Wedding Venues. Melbourne is blessed with some lovely wedding venues. Some of my favorites are in the Yarra Valley and Dandenong Ranges which highlight beautiful bushland just outside the main city areas. But my (current) favorite wedding venue is an inner city venue – St Michaels Church on Collins St. I shot a wedding there in October 2013 and it offers so many options in close proximity. The church itself is a magnificent building. Within a short walking distance are inner city laneways, classic tramways, parliament building, funky coffee shops and restaurants, the Yarra River, Federation Square, and Flinders Street Station. This shot is taken just behind the church. Melbourne’s famous weather added the light rain which helped reflect the brides dress. Nice one!

Wedding

Melbourne has some great inner city wedding photo locations

These are my home town favorites. Do you have home town favorites to share?

Part Time Paradigm

Better backgrounds

There are a growing number of photographers choosing to operate on a part time basis

There was a time when the difference between a professional photographer and an amateur was that a professional got paid and an amateur did not. Times have changed and the lines between the two have blurred. Professional now refers to a quality of work, not whether you get paid. There are many people who generate professional quality photography work, but have a main income from another source. When I was growing up, if you wanted to be considered a professional photographer, then photography had to be your main vocation. Again, times have changed. Today there are many photographers whose main source of income is from non-photography work but their work is of professional standard – I call this the Part Time Paradigm.

I have recently read David Du Chemin’s book – VisionMongers – which addresses the issue of ‘making a life and a living in photography’. It is an excellent book. In the early chapters it considers the issues around whether or not to make photography your primary vocation. He explains that it is not easy to make a living in photography, and gives some great examples of people who are succeeding. This week, I’ve also read a post on The Digital Photography School which considers the benefits of part time photography. Both of these have lead me to today’s post on Beyond Here.

Is the Part Time Paradigm real?

Often people consider how well a photography business is doing by whether the photographer is conducting their photography business full time, or how much work the photographer has, or how many staff the photographer has. I come across this thinking nearly every week, and only in the last year have I realized the power and the benefits of part time business. The Part Time Paradigm is real, and lots of photographers are living it. Maybe you should consider it too.

What does it look like?

Money laundering

The benefits of the part time paradigm are more than financial

Firstly, the photographer has another source of income, normally from a job. This provides them with a steady income and lets them operate their photography business outside of their job commitments. Secondly, there is a range of photography work they can be doing – stock, wedding, family portrait, landscape … the list goes on. Thirdly, whether they are ‘professional’ or not now has a mixed meaning. It could refer to how they conduct their business, or the quality of work they are producing. Importantly, it doesn’t refer to whether they get paid or not, or whether that is the only way they spend their working week.

Why operate like this?

The main reason for operating in the part time paradigm is often overlooked. It is possible to be passionate about photography and have an interest in something else. It doesn’t have to be all or nothing. Think about it for a moment, a doctor might love photography, and it doesn’t mean they hate being a doctor. Equally a bus driver can love driving buses and love photography. When I boil it down, professions used to define us. This made it hard to change. Today, your profession doesn’t have to define you. You can change. You can be a doctor today and a photographer tomorrow. Or you can be both at the same time.

Interestingly there is still a line of thinking that you can’t be taken seriously unless you are operating as a full time photographer. To me, this is a notion of the past and thousands of photographers are living the part time paradigm. Perhaps a lot more should?

What are the benefits of the part time paradigm?

The benefits of the part time paradigm include:

  • financial stability by having multiple sources of income.
  • you can invest in equipment not promotional material. For full time photographers, it is very hard to justify investing in equipment compared with investing in promotional material to generate more business. In the part time paradigm you don’t have this conflict, you can buy the gear you want.
  • effort can vary. A full time photographer needs work year round and generally won’t go for very long without camera in hand. The part time photographer can vary their work with the season or with their mood. They can dip in and out. Work lots this month, take next month off.
  • you can stay true to your creative vision. Under the part time paradigm you do not have to shoot family portraits on the weekend to keep money coming in. If landscapes at sunrise are your one true love, that’s all you have to shoot in the part time paradigm
  • being able to live a life of variety. It is possible and legitimate to love photography and love something else. It is possible to do both. Shoot weddings all summer, focus on your other interests all winter.

Do you believe you have to operate full time to be a successful photographer? What’s your take on the Part Time Paradigm?

Selling Prints Online

This post looks at the topic of selling prints online as a way to generate an income from your images. This comes on top of recent articles which looked at building financial success through photography. Those posts are here:

There are a range of e-business opportunities available to photographers today. I have contributed to microstock agencies since 2008 as a key way to generate income from my images. That has been productive and financially successful for me. Since mid 2013, I have also been selling prints online through Fine Art America. This post covers my experience and lessons learned. (Follow this link to see my portfolio on Fine Art America)

Selling prints online

Selling prints online is a straightforward process. It suits photographers who prefer for someone else to find the end customer, while they get on with shooting

How does it work?

Fine Art America’s website is very easy to use. After setting up your account, you upload your images, add titles, add descriptions, and add key words. These are so that your image (or artwork) can be found by users of the site. One key element that is different from microstock is that you get to set your own prices – which effectively means you set your own margins. Nice. This is also a straightforward process and is done quickly and easily. Set your prices high to make higher margins but likely low sales volumes. And set your prices lower to make lower margins but likely higher sales volumes.

What do users do?

Rather than downloading an image for use, users of Fine Art America order a product made with your image. While I have titled this post Selling Prints Online, users can order a range of different products with your images on them – not just prints (smart phone covers are one clever use and is a large, emerging market). In short, rather than receiving your image electronically, the end user receives a physical product with your image on it.

Why does this work?

Selling prints online works well for photographers who want someone else to find customers for them. In this case Fine Art America generates traffic to the site, to buy prints of your images. This is ideal for photographers who are busy shooting or working another job. All the photographer has to do is upload the image, add details, and leave the sales process to Fine Art America.

What has my experience been?

I have 200 of my wildlife images available on Fine Art America. That’s not many, and is dwarfed by the 6000+ I have available through iStockphoto.

Kookaburra

Sample of one of my wildlife images available on Fine Art America

While I have outlined above that the upload process is straightforward, my sales have not been very successful. It may be both the type of content I have uploaded, and also the relatively small number of images. Overall, the sales generated through selling prints online has generated very small income. Again, it is dwarfed by my microstock sales, and hence I continue to focus on microstock while online adding images to Fine Art America from time to time (generally on really cold, rainy winter days!!)

Lessons Learned

While selling prints online has not been very successful for me – I note other photographers and artists selling artwork regularly. My observations are that they either have:

  • very unique imagery, or
  • are a well known name, or both

For example, Anne Geddes sells her images on Fine Art America. She is very well known for her unique images of new born babies. If you would like to check out her work, go to Fine Art America and put her name in the search field.

Final thoughts

Selling prints online has not been very financially successful for me so far. I’d suggest using an outlet like this to generate an income from your images if you have very unique content or a very “arty” bias in your work.

Do you sell prints online? What has your experience been?

Favorite Wildlife Photography Locations

This post looks at one of my favorite wildlife photography locations – Yarra Bend Park in Melbourne, Australia.

Flying fox

Grey headed flying fox showing off its wingspan. Yarra Bend Park, Melbourne, Australia

Where is it?

Yarra Bend Park is 4km north east of the Melbourne central business district in the suburb of Kew. If you are familiar with Melbourne, it is also close to Abbotsford, Collingwood, and not too far from Richmond. It is a 260 hectare park, which makes it the largest area of natural bush land close to the city center. In the area are large residential areas, bush land, parks, sporting fields, and golf courses. The Yarra River winds its way right through Yarra Bend Park. The area is popular with cyclists, walkers, mountain bikers, and has a great lookout area which provides views of the sun setting behind the city.

How do I find it?

I first went to Yarra Bend Park in 2008 when I was invited to play golf at the public golf course there. I have since found out that it is well known in Melbourne, but I had not been there before 2008. My round of golf, which I remember being a particularly bad (!), was the first of many trips.

What can I do there?

Actually, more than I realized! I looked up the Parks Victoria website and it shows that you can do walking, jogging, golf, fly fishing, picnic, sports, eat at the restaurant, visit Studley Park boathouse, and see Dight Falls.

Flying Fox

Position yourself to get clear background for your image

But the main thing I go to see are the huge number of grey headed flying foxes. They roost in the trees next to the Yarra River in very large numbers. There are publicly accessible walkways through these areas on one side of the river. You can see them hanging upside down in the trees, sometimes sleeping, sometimes interacting with each other, and now and then keeping an eye on you! If you had a view that bats or flying foxes did nothing during the day, that’s not the case. On most times I’ve visited there is plenty of noise and movement, and it is fairly straightforward to get images of bats in flight. In early summer, October and November, if you look closely you can also see them flying with their babies clinging to their chest.

About Grey Headed Flying Foxes

Grey headed flying foxes are the largest bat in Australia. They have a dark grey body, a light grey head, and reddish-brown fur around their necks. The  adults have an average wing span of 1 meter and can weigh up to 1 kg. They rely on sight to find food, and so they have relatively large eyes for a bat. But the thing that strikes you when you see them at Yarra Bend Park is just how many there are. It’s a huge thriving community of bats!

What Equipment Should I Take?

Canon lens

The Canon 70-200mm f2.8 lens

While there are a lot of flying foxes at Yarra Bend Park, they are small animals and will often be some way off in the trees. To get close up images of them, you’ll need at least a 200mm lens. Even better is a 300mm or 400mm lens. (All the images on this post were taken with a 200mm lens.) For camera bodies, I use my Canon 7D for the high burst rate. It is ideal for taking images of these flying foxes in mid air. And I always take several memory cards. It is easy to take plenty of shots in burst mode and I don’t want to run out of memory.

What Types of Shots Can I Get?

Due to the large numbers of animals here, you can get a range of different images. It is possible to get these shots of flying foxes:

  • hanging upside down staring straight at you
  • interacting with each other seemingly oblivious to any humans nearby
  • in flight
  • isolated against a grey or blue sky
  • in silhouette against the sun
  • showing the veins in the wings

How do I Take Shots of Bats in Flight?

Flying fox

Flying foxes gather in big numbers at Yarra Bend Park

Taking shots of the flying foxes in mid flight is not difficult – particularly as there are so many of them. My suggestions for achieving this shot are to:

  • position yourself so you can get an uncluttered background
  • if it is a windy day, get them flying into the wind. They will be going slower which makes this shot easier
  • use the continuous focusing mode on your camera and track them in flight
  • use the burst mode to take a series of images in quick succession
  • use a fast shutter speed. My best images of these animals have been at 1/2500s and faster shutter speeds

Why is Yarra Bend Park a Favorite Wildlife Photography Location?

Yarra Bend Park is one of my favorite wildlife photography spots because:

  1. it is so easily accessible. It is only a few kilometers from the city and there is easy parking
  2. I have visited over 20 times, and the large group of bats has always been there
  3. there are so many animals, that a wide range of images is possible
  4. the contrast of being able to shoot what I consider to be a night animal during the day is unique

Take Me There!

I’ve always thought that Yarra Bend Park would be a great place to conduct photography tours. If you’d like me to take you there, drop me an email at craig@beyondhere.com.au

Thanks for reading all the way to here! I hope you might think of bats differently now. Yarra Bend Park is one of my favorite wildlife photography locations.

Fruit bat

Bat in flight, with baby on its chest

Manly Urban

Today we have a guest post from Renate Hechter from Pure Dynamics Photography in Sydney, Australia. Earlier this year Renate launched a new twist on family portraits – a concept called Manly Urban. In this post, she explains Manly Urban.

Thank you again Craig for giving me the opportunity to post on Beyond Here.

I have the privilege of living near one of the most beautiful areas in the world.  I do not think anyone that has been to Sydney and more to the point, Manly, would disagree with me.  One is surrounded by beautiful expanses of blue ocean, with the heads in the background on one side and Manly beach on the other side.  If you have ever been on the Manly ferry, you would agree that it one of the most iconic and picturesque methods of public transport.  All in all, to be able to have this view, day in – day out, is not only a blessing, but a calling to a photographer.

Manly

Manly Urban. Family portraits with famous Manly backgrounds. Copyright Renate Hechter.

For any photographer, it is important to create a service that is new and different to new and existing clients.  I have come up with the ManlyUrban idea, as people not only love to get some photographs of the area they live in, but it also provide a beautiful and modern back-drop for some stunning and different photographs. Manly also has a huge expat community, so it is a great keep-safe of your “home away from home”.

As you walk around and through Manly, you will realise it is a treasure-chest of scenic and urban areas. Here are some of my favourite areas.

  1.  Manly Ferry/Heads (in the background)
Family portrait

Manly Urban. Families in context. Copyright Renate Hechter.

The Manly Ferry is a tradition.  Since 1855 it is a “must do” for visitors.  It is the way Manly locals commute to Sydney. It operates 7 days a week, day and night.  It is one of the most picturesque and relaxing commutes in the world.  What a wonderful way to include this as a backdrop for a photograph.  The same is to be said for the famous Sydney Heads, which is the 2 kilometer-wide entrance to Sydney Harbour. People from all over the world will recognize it and these are some of Sydney’s most iconic landmarks.

  1.  Manly Corso
Manly

Manly, Sydney, Australia. Copyright Renate Hechter

The Corso is a busy and bustling place.  It provides direct access from the Manly Ferry Wharf to Manly beach.  It is also the main shopping area of Manly.  You get locals, tourists, buskers, mum and babies, school children, toddlers in the playground, retirees, surfers, skateboarders and many more all mixed together and wandering about.  Being photographed in the Corso takes some courage, as soon a crowd of people will gather to see what you are up to.  (My urban ballerina kept her cool in the Corso, even though she was surrounded by holiday-makers).

  1.  Murals
Manly

Murals make vibrant backgrounds. Copyright Renate Hechter.

There are a number of murals in different alley-ways in Manly that provide fabulous backdrops for urban photography.  Note, Manly Urban are not just for children.  My friend, Liz, is a local business owner and a Manly local.  As an artist (www.muktiart.com.au) she loved the opportunity to have a photograph taken in her beloved Manly in an area where the photograph could double as a piece of art.

When you visit Sydney again, make sure you get your Manly fix. You may even see me shooting Manly Urban in different locations! Please STOP and say HI!

Succeed in Photography Business

Photo business

Financial success means different things to different people

People get into photography driven by a love of making images, not a love of dealing with business issues. It is passion and creativity that drives us, not a desire to spend hours doing book keeping or other business tasks. I see plenty of photographers who produce brilliant work but struggle to make a living. That leads me to consider – can non business minded people succeed in photography business?

This is a big question – so where do we start? We need to start by understanding what success means to you. What is your definition of success? There are as many answers to that question as there are photographers, but the only answer that matters is your own. What is your definition of success?

Is success:

  • to be able to call yourself a professional photographer regardless of whether you make any money?
  • to make enough money to fund your gear purchases?
  • to make a significant supplementary income to add to another primary income source?
  • to make an income equivalent to the national average income?
  • to make three times the national average income or more?

Lets look at each of these.

Success Level 1 – Calling Yourself a Pro. If success is to be able to call yourself a professional photographer, regardless of the income generated, then yes – this can be achieved without much business knowledge. If you want to reach this level of success, focus on acquiring pro standard equipment and get a nice website. You may not have too many clients knocking down your door, but you will have some nice gear to use, time to shoot personal projects, and a nice website to display your images. You can also look into membership of your national photography body.

Photo business

Business skills can be learned as your photo business grows

Success Level 2 – Fund Your Gear Purchases. If success to you is to be able to generate enough income from your images to fund your gear purchases – this too can be done with limited or no business skills. If you would like to do this, I would recommend looking into micro stock photography sites and selling prints online. In both of these models you simply upload your images to the site and they do the work to attract buyers and complete the sales transaction. Keep in mind that any sales generated are likely to be slow to start with and build over time. You will need to be patient. If your goal is to generated a few thousand dollars each year then this is a legitimate way to do it – and thousands of photographers are doing this. If you are interested in using micro stock photography to get here, you may be interested in this post.

Success Level 3 – Making a Significant Supplementary Income. By a significant supplementary income I mean greater than $10,000 per year. I expect you would need another source of income in addition to this. Perhaps you work full or part time and run your photography business outside this. If you hope to reach this level of success it will help if you start to learn some business skills. At this level you may be using micro stock photography to provide some of that income and you may be taking on some commissioned work. It could be weddings or family portraits or other client work. At this level it helps to have an understanding of business structures, so you can consider what structure suits you best, particularly if it is going to continue to grow. You would also benefit from some understanding of invoicing, book keeping, marketing, and tax.

Success Level 4 – Making the National Average Income. At this success level, if you are running your own photography business, you will need to have some business skills. In addition to the skills mentioned above you’ll need to have a good understanding of marketing your business, and that will probably include a good understanding of social media and online marketing. This will ensure you generate a pipeline of future clients which sustains your business into the future.

Photo business

It is possible to achieve high income through photography but it will require business skills as well as photographic skills

Success Level 5 – Making 3x the National Average Income or More. If success to you means generating an income three times the national average or more then you will need business skills. In addition to the skills above you may need to also understanding issues related to contacting and sub contracting, employing staff, contract law, pricing, and you will definitely need a strong marketing plan. You possibly will need to invest time and effort into generating partnerships – perhaps with wedding venues, or advertising agencies. At this level it is likely your photography skills will need to be very strong as well. That’s my take on what is required to meet these levels of success. I see many photographers producing great images but not succeeding financially. If you are one of these, my recommendation is to invest in building business skills, not photography skills. It is also possible that investments in the business need to be into generating new clients, rather than further investments in equipment. That might be advertising or a new website or promotional materials.

In summary, you can achieve success levels 1 and 2 with limited or no business skills. If you want to ‘get serious’ and move to levels 3, 4 and 5 you will need business skills. If you are starting out it is absolutely legitimate to work your way up through the levels. If you believe you are not business minded – don’t worry, business skills can be learned along the way. If you are determined to succeed, the skills can be learned. Equally, if you have strong business skills you can get started at level 4 and 5. There is no tried and true formula here – you can make it your way based on your own skills and knowledge.

These are my thoughts about whether non business minded people succeed in photography business. Here comes the disclaimer – I’m not a business adviser, or financial adviser, or any type of adviser. I’m a photographer. Please keep this in mind and seek your own expert advice. Can non business minded people succeed in photography business? What do you think? What is working for you?

Photographing Babies

Recently on Beyond Here we had guest contributor Renate Hechter of Pure Dynamics Photography in Sydney, Australia contribute a post titled Newborn Photography Some Easy But Essential Tips. Coinciding with that, I had the opportunity to photograph a 6 week old baby. Photographing babies is always special, but this was more special as I had photographed the parents wedding in 2012. Here is an outline of how the shoot went, and some insights and tips for photographing babies.

Baby Photography

Work to baby’s needs. If baby wants to stay in mum’s arms, let him or her.

Preparation. We organised the shoot to be in the morning to fit in with baby’s normal routine. We discussed clothing before the shoot, and the parents brought several changes of clothes for baby and for themselves. We concentrated on solid colours which would look good in colour or black and white. We avoided patterns.

The session was held in my studio and in preparation I made sure we had:

  • the heater on, so the room was nice and warm
  • a place where the parents could put their bag
  • a chair where mum could feed baby
  • back drops in place and ready to go
  • lighting in place and ready to go
  • a bean bag handy which we could position baby on
  • 2 camera bodies with lenses on, to save on time changing lenses
Baby Photography

Converting images to black and white helps keep focus on baby and not on any minor imperfections

On the Day. When the clients arrived the baby was wide awake and looking very alert for a 6 week old! It must have been all the new sights and sounds and smells. However, despite all our best preparations baby was reasonably unsettled throughout the shoot. While he was fed several times and kept nice and warm, it was just one of those days where he had other things on his mind apart from being the ‘perfect model’. Not to worry! This is quite normal for really little babies and so it important to remain relaxed – and to keep mum and dad relaxed. In this case, mum and dad were well prepared and not in a hurry so we did have time, and enough cooperation from the model, to get them some ‘A’ grade images.

Shot Plan. I plan my shots and poses before the client arrives and make sure I have any equipment on hand. That is helpful for making the most of the time, but it is more important to remain flexible. If baby wants to stay in mum’s arms – let him or her. There will be time to do all the shots planned, they will just need to be done in an order and a time which baby is happy with.

The Results. Don’t worry – this story has a good end. Firstly, we all had a relaxed and enjoyable time. Baby wasn’t the perfect model, but we all had fun and we have finished with a number of ‘A’ grade images for the family. This was a good reminder to not get stressed if baby is not perfect. You will have a short window of opportunity when baby is settled to get those images you need. Be patient and be ready.

Baby photography

A hat or beanie helps make a baby’s head look normal and to keep warm

Insights. There were several things which went really well from this shoot that are worth taking as insights or tips. They were:

  • ask parents to bring several changes of clothes for baby and themselves. At this shoot, baby had a “call of nature” on his dad. Dad had a change of clothes, so we had no problems and a funny story to tell!
  • include several hats or beanies for baby. A baby’s head can look disproportionately large compared to its body. A hat will make it look in proportion
  • be flexible. This was essential in this session. We worked to baby’s routine and got a good outcome
  • relax. It helps the parents relax too. They need to have an enjoyable time as well as having nice images
  • it’s not about volume. You don’t need hundreds of great shots for very little ones. This shoot is capturing a moment in time, and a handful of good images will do that
  • convert images to black and white. Black and white is very effective in newborn photography. It helps to focus on the beautiful little parcel, and not on skin imperfections or colouring

Do you have a story to tell from photographing babies? Key lessons learnt? Tips for good outcomes?

The Benefits of the Off Season

Right now, in Melbourne, Australia, it is the middle of winter. After a reasonably mild June we have had a cold, grey, windy July. It is a quiet time for weddings, with most weddings being held in the warmer months between September and March. I don’t shoot many weddings at this time of year, so this post covers the benefits of the off season.

I am really glad that my wedding business is seasonal and that there is a quiet time of the year. I wonder what it must be like to be a wedding photographer in Hawaii where there are lots of weddings all year round. Would you ever get a break? How would you re-charge the batteries? How would you stay fresh?

Wedding

The wedding off season is a chance for photographers to recharge

I see lots of good things about having a slower time of year. Here are the key ones – the benefits of the off season.

Rest and recharge the batteries. During spring and summer it can feel like a never ending run of weddings to photograph, images to edit, deadlines to meet, and albums to deliver. It is an exciting time as you watch the brides eyes light up at her new album, and the mother of the bride burst into tears as she sees the large print of her daughter in her wedding dress for the first time. It is also a really busy and challenging time. The more successful you are, the busier you can be. The first benefit of the off season is the chance to rest up and plan for the season of weddings ahead. Life in the fast lane can be great, but life in the slow lane can be a welcome change.

Evaluate your work. Being less busy gives critical time to evaluate your work. How has it improved over this wedding season? Where does it still need to improve? What new edge can I bring for next year? The slower pace in winter gives crucial time to reflect and plan, and prepare for next seasons weddings.

Revise marketing materials. The winter wedding slowdown gives a great opportunity to assess marketing materials and to ask key questions. Does my marketing material reflect what I can bring to a bride and groom? Do they communicate how I am different to other photographers? Do they attract my target client? The off season is a great time to re-assess marketing materials and the marketing plan.

Fruit bat

The off season is a great time to shoot personal projects

Shoot personal projects. In the middle of summer, back to back wedding work makes it very difficult to tackle any other photography work or projects. One of the great benefits of the off season is to shoot personal projects. I love wildlife photography and find the time in the great outdoors to be refreshing and invigorating. This time of year gives me the chance to shoot wildlife projects.

Try new things. The off season is the time I try new things. When I am in the middle of wedding season and I have brides and grooms relying on me, I stick to equipment and techniques I know and have practiced many times. A wedding is the time to deliver a great client experience, not to experiment. Winter gives me the chance to try new styles, new equipment, and new post processing techniques. It’s the time to learn, and learning helps keep us fresh. Photography is a lifelong process of continual improvement and winter is a great time to improve.

Evaluate the business. In Australia, the end of the tax year is in the middle of winter. This is a great opportunity to connect the creative side of a photography business with the business side. How well is the business doing? Where could it do better? What can I learn from other photographers businesses? What can I learn from other creative businesses? The slowdown in client work is a great opportunity to assess whether I am meeting business goals, not just creative goals.

Books

Rest, relax and read in the off season

Read. I love to read and winter is the time that I read the most. Recently I have re-read two books about the business of photography which I highly recommend. They are VisionMongers by David Du Chemin, and The Fast Track Photographer Business Plan by Dane Sanders. Whether you already run a photography business or are considering it, these books are both well worth reading. Another of the benefits of the off season, is the chance to reflect and read, and to learn from others. It helps bring perspective and to open your mind to new approaches.

I love winter and the off season. It is also the time in Melbourne to get to the AFL football! So there you are – seven of the benefits of the off season. What do you like to do when client work is slow? Do you enjoy off season or would you prefer to be busy year round?

Five Lessons from Film Photography Days

I have come across several photographers and clients recently who can barely remember film and film cameras. I feel fortunate to have lived through both the film photography and the digital photography eras.Soon there will be a generation who only grew up with digital. Technology changes have brought changes to photography, and made me think about my top five lessons from film photography days.

Film camera

We are getting to a time when many young photographers have never used a film camera

In the days of film, photography was different. I bought my first SLR camera in 1997. At that time, you planned how much film you could afford and could carry. The rolls came mainly as 36 exposure or 24 exposure. You were careful with how you used each exposure as you had a limited number and each one cost you money, both to buy the film and to have it processed. When you got your film processed it could be days, weeks, or months after you made the image. Wow, times have changed! Today, memory cards are cheap and have almost unlimited capacity. Images can be viewed on the back of the camera immediately. Often, images don’t ever get printed, they exist only in digital form. So, looking back on what I’ve learned, what are my top five lessons from film photography days?

(1) Consider Composition

In the film photography days, you had to carefully consider each image before you took it. With a limited amount of film, you had to make sure it lasted. With today’s cheap memory cards there is almost no limit on the quantity of images you can make. Sometimes this leads to an approach of shooting everything – summed up in that great description to “spray and pray”. Unfortunately this can lead to a large number of poor quality images. Lesson 1 – take the time to consider composition. It will improve your photography, and save you time reviewing and processing lots of poor quality images.

(2) Learn Faster

You had to wait for processing in the film era. This made it difficult to learn, as sometimes I could hardly remember actually taking the shot! Being able to review images instantly in the digital age gives us a great opportunity to learn faster. To make the most of this opporunity to learn faster, take the time after each shoot to review the images you have made and consider how you could improve them next time. Do this on your computer away from the shoot.

(3) Avoid Constantly “Chimping”

Chimping is that annoying habit of constantly reviewing your images on the back of your camera. In the film photography days, this option didn’t exist. Ironically, this helped the photographer engage with the subject and remain focused on creating great images. In effect, it kept you in the “creating zone” and didn’t allow you to drift into “reviewing mode”. If you are a photographer who checks the LCD screen after every image – think about not looking at it for a while, and staying engaged with the subject you are shooting.

(4) Get it Right In-Camera

Film

Film and film canisters used to be in every photographers bag. Now very few carry film.

Digital technology and the post production tools we have now give us great flexibility to adjust images after they have been made. Unfortunately this also leads some people to believe that the quality of the image coming directly out of the camera is less important now as they “can fix it in photoshop”. I hope you cringed as you read that. A bad image will still be a bad image after post production. A really good image straight from the camera, can remain a good image, or be enhanced further in post production. Don’t get lazy and expect your camera and post production tools to do everything for you. Learn your craft. Get it right in-camera and use post production tools to enhance, not fix, your images.

(5) Print Your Best Work

In film photography days, there were only prints or slides. Now it is very common for images to exist only in digital form. They can be shot on a digital camera, digitally enhanced in post production, and be used only on websites. If you have ever seen good quality images in print you will know how powerful prints can be. Think of family portraits in a home, wedding images hanging on walls for generations, and landscape images in corporate boardrooms. Take the time to print your best work. It will have an impact.

These are my top five lessons from film photography days. I don’t miss those days, but I feel lucky to have used film and digital technology. Did you live through the film photography era? What lessons did it teach you? Do you miss any aspects of that era?