Tag Archives: photography tips

Tips for Photographing Tennis

Summer is a super time for shooting outdoor sports and capturing action. Lots of people are enjoying the warm weather, getting exercise, and enjoying social time. Here are some tips for photographing tennis.

Tip #1 – Making use of Different Light Conditions

In this post I am including images shot in very different lighting conditions – day, evening / twilight, and night. All offer great opportunities to shoot different styles of images.


Daytime images will typically offer the brightest lighting conditions

Day time images will usually offer the brightest light and will make capturing fast action easier. Twilight images create opportunities for silhouettes and more unique images. And night shots will often give you the opportunity to have the well lit player stand out from the dark background. Explore all lighting conditions for variety in your images.

Tip #2 – Explore Different Shooting Angles

On a tennis court the action takes place in a defined space. If you’re not careful your images can begin to look the same. Try exploring different shooting angles to create variety and interest.

A low angle adds interest in this image

Tip 3 – The Ball Adds Interest

It is not a universal rule, but in general, images which include the ball are more interesting than those without. Don’t take this as a golden rule, but do observe your own images. That makes your timing important to be able to capture the ball in your images while it is close to the player.

Try including the ball in your image

Tip #4 – Use Fast Shutter Speeds

Capturing the split second action while the ball is close to the player requires good timing and equipment. It is something which definitely gets better with practice. Use fast shutter speeds to help you freeze the action. How fast? The image above is benefiting from shooting into the bright sun allowing a shutter speed of 1/8000s.

Tip #5 – Close Ups Can be Very Interesting

Try shooting very close up images of tennis players. I don’t mean to stand super close (!) but use a zoom lens to create an image which captures the player’s facial expression. Very close up images can be super interesting.

Tennis close up images can be very interesting

Thanks for reading these tips for photographing tennis. Happy shooting!

Shoot to Two Cards

On a recent shoot, a client shared that her friend had lost all her wedding photos as the photographer had a problem with the memory card. A nightmare scenario for both the bride and the photographer! What a nice reminder to shoot to two cards.

Most readers of Beyond Here are professional or semi professional photographers. I hope that for many this is a piece of advice that you don’t need as you routinely shoot to two cards.

Canon camera with card slots for CF and SD cards

Older Digital Cameras Only Have One Card Slot

In early generations of digital cameras, the camera typically only has one card slot. In many ways, this made things easier as I didn’t have to think about whether I wanted to shoot to two cards. My second shooter at weddings was also my backup should anything go wrong with any of my cards.

Newer Digital Cameras Come with Multiple Card Slots

Digital cameras evolution has led to cameras with multiple card slots. Pause for a moment to think why would this be? It is to overcome the odd occasion when something goes wrong with a card. How handy to have the images recorded to another card.

An older Canon digital camera with single CF card slot

Get into the Habit – Shoot to Two Cards

I know several photographers whose standard procedure is to shoot only to one card. It saves them money on buying cards, and time in managing files. I hope they don’t learnt the hard way that shooting to two cards is a lot wiser and is worth a little extra cost of buying some more cards.

Purchase some extra cards, and make shooting to multiple cards the default setting for your camera. It will be great peace of mind should anything go wrong with one of your cards.

Thoughts from Photographing A Major Gymnastics Competition

Last week I was photographing a major gymnastics competition, the Gymnastics World Cup competition held in Melbourne, Australia. I’ve shot a fair amount of gymnastics in the last year – from recreational gymnasts through to some of the world’s best. Here are 5 thoughts from photographing a major gymnastics competition.

Thought #1 – Subject Matter Matters

Photographing a World Cup event is very different than shooting recreational gymnasts at the local club. The strength, flexibility, and balance of the top gymnasts is quite amazing and leads to unique images that can’t be produced with less capable athletes. So, thought number one from photographing a major gymnastics competition is that subject matter matters. If you want to shoot really unique images, it helps to start with subjects who can do unique things.

Gymnast doing back flip on beam
To produce unique images it helps to start with subjects who can do unique things

Thought #2 – Be Different

In the women’s beam competition there were 9 photographers located to the right and back of the image above. They were literally on top of each other shooting the same subject from the same angle (I took a photo of them to amuse myself). While there is an argument that there is a “best position” to photograph each apparatus, be brave enough to be different. I stood on the opposite side of the floor. It meant I didn’t have a great shot of the women’s beam competition, but I was the only photographer shooting the men’s vault. Vault is difficult to shoot so many photographers decided not to. I like the opportunity to shoot unique images. Be brave. Be different.

Men's vault competition. Gymnastics.
I know the images I shot of the men’s vault competition are unique as I was shooting all alone. All the other photographers were together shooting women’s beam

Thought #3 – Look for Bold Colors

Gymnasts wear unique clothing for their competitions. They range from simple all black or all white, through to multi colored and patterned designs. Looks for bold colors to help create strong images. Particularly look for reds and blues. Bold colors will help your images stand out.

Male gymnast doing rings
Bold colors (especially reds and blues) will help your images stand out

Thought #4 Shoot a Range of Apparatus

At some gymnastics events there are multiple apparatus going at one time. In that case you have to choose which one to shoot, or get lucky and find a position where you can shoot multiple apparatus from one location. At this event, there were only 2 apparatus operating at one time. That made it easy to make sure you created variety in your images by shooting different activity. It reminded me to shoot a range of apparatus so your images don’t all look the same. That’s thought number 4 from photographing a major gymnastics competition.

If you stay on one location your images will look similar. Move to different locations and shoot different apparatus

Thought #5 Interesting Images Aren’t Only of Competitors

At a big sporting event there are lots of people and lots of activity. There are many compelling images waiting to be made from people other than competitors. Keep an eye out for judges, coaches, spectators, and other people involved in the event but not directly competing. Shooting these images well will guarantee you produce unique content.

Keep an eye on judges, coaches, spectators and other people to produce unique images

If you’d like more tips on shooting gymnastics please see:

Thanks for reading Thoughts From Photographing a Major Gymnastics Competition.

5 Tips for Photographing Models

Working with models is different to working with non models. Models are used to being in front of camera, and have often worked with a wide variety of people. They are generally not self conscious or shy, and they want to keep shooting until the right look has been captured. It is very different to shooting portraits or weddings for non models. Here are 5 tips for photographing models.

Tip 1 – Provide a Pre-Shoot Briefing. The model wants and expects to be a part of a creative team fulfilling a brief. Don’t expect the model to understand the look you are trying to achieve without discussing it with them first. Take time to explain the shoot and the desired outcome, and be open to input from the model.

Business Woman

Providing a briefing about the look you are trying to achieve

How do we do this? If this is self commissioned work, its about being able to explain the look you are wanting to capture. If it is client work, it is about being able to translate the clients brief into a vision for the model to understand. Take your time. Share sample images. Discuss what you are, and aren’t looking for. Allow time and space for discussion.

Photographing models is different than photographing non models. Tip number one, provide a pre-shoot briefing to the model. Share your vision with them. Let them add their good ideas to yours.

Shopping

A relaxed and confident persona will be picked up by the model

Tip 2 – Be Confident and Genuine. Reality check! This tip is the same whether you are working with models or non models. Being confident means being well prepared. Your gear is in order. You equipment is laid out near the shooting area. You have practiced before the shoot and are not making it up as you go. You know what you are doing, and the shoot is going to be a success.

Being genuine is about treating people with respect. If you are starting out and have limited experience, don’t pretend to be something you’re not. Tell your model. We have all been in the same position and 99% of people will treat you well. Some will even go out of their way to help. Be confident. Be genuine. People respond well to these traits.

Tip 3 – Work in a Collaborative Way. Working with a model is having a partner in a shoot. It’s about working together to achieve strong images. It’s not about you working alone and achieving results despite your model.

I like to make sure the model is well briefed and it is clear we are working as a team – one (or more) in front of the camera, and one behind the camera. I like to share images during the shoot. That’s reviewing images together and discussing what’s working well and why, and what’s not working well and how to fix it. This works really well when we have ‘nearly’ got the look we want and just need some minor adjustments.

It’s a team effort. It’s about achieving strong images together. Tip number 3 work collaboratively.

Female portrait

Provide sincere feedback about what is working and what’s not

Tip 4 – Provide Sincere Feedback. Tip 4 goes along with tip 2. It’s about the relationship of different parties working together for a common goal. Models are not camera shy and don’t need insincere praise of everything they are doing. Everyone enjoys some positive feedback, but remember you are working with a professional. Give feedback on what’s working well and what’s not. Be specific. Work together to achieve the results you are looking for. You’re there to achieve a result, not to be a cheerleader. Tip number 4, provide sincere feedback.

Tip 5 – Relax. All people being photographed will be influenced by the mood and behavior of the photographer. If you are uptight, tense and irritable – expect the model to pick up on that. Your model will feel and look uncomfortable. If you are positive, confident and relaxed that will also translate to your model. Work on preparing well, so  that everyone can relax and enjoy the shoot. You’ll produce better work this way.

Thanks for reading 5 tips for photographing models. Happy shooting!


Add Interest to Your Wildlife Images

I am a big fan of wildlife photography. The world around us is amazing and so are the animals in it. Here are 8 quick tips to add interest to your wildlife images.

Corella

Multiple animals in one image adds interest

Multiple Animals. A single animal on its own can create a great image, but multiple animals in the frame adds real interest. The image becomes about that type of animal, but also about the interaction between them. These corellas look like they are working as part of a team to keep an eye out for potential danger.

It is harder to shoot multiple animals in one frame – but look out for these opportunities. They are a good first step for how to add interest to your wildlife images.

Joey

Look out for baby animals to add impact to your images

Baby Animals. If you want to get a strong reaction to your wildlife images, look out for baby animals! There is almost a guaranteed ‘wow’ if you can shoot images with baby animals in them.

In this image of a red kangaroo and her joey, it appears that the joey is peering out from the protection of its mother to see what the photographer is doing.

The size difference between the two animals, and the cute ears, mean added interest to a single animal or two adult animals. Baby animals are a very easy way to add interest to your wildlife images. I wrote a previous post about this, which you can see here.

Clean BackgroundsLike with any sort of portrait a clean, clear background will help your subject to stand out in the image. And this will help focus the viewers attention on the subject.


Black swan

A clear background of the lake helps focus attention on the black swan

This image of a black swan was taken in Perth, Western Australia. Fortunately when swans flap their wings like this, they tend to do it several times. This enabled me to get in a position with a clear, water background. It has no distracting lakes edge, or reeds, or people walking past the lake.

When you are next out shooting, see if you can add interest to your wildlife images by removing any distractions in the background. Clean backgrounds help to produce compelling wildlife portraits. 

Tasmanian Devil

Interaction creates interest

Interaction. One of the benefits of having multiple animals in your image is that you will often see them interacting. Not only can you get a great image of the animals itself, your image can provide insight to the connection between animals. Wait for the moment when the two animals connect.

Cockatiel

Shoot close up with a long lens

Close Ups. Getting really close up can add a lot of interest to your wildlife images. Through your camera and your image, you can provide a view that is not possible to the human eye. This cockatiel pair would not let me get this close if I was standing near them, but with a zoom lens we can see them in close up.

Duck

Blue billed duck reflected in the lake

Reflections. Reflections can add a lot of interest to your wildlife images. I wrote an earlier post about this which you can find here.

This is a blue billed duck. See the interesting reflection in the lake. Good reflections need still water. Often the best time for this is in the early morning.

If you are an early riser, take advantage of the reflections at this time of day.

Grebe

Look for animals in action

Action. Animals in action adds a lot of interest to wildlife images. This bird is a grebe and this shot was taken at a lake in Perth, Western Australia. It is common for these birds to run across the top of the water. Be patient and use a fast enough shutter speed to freeze the action. 

Parrot

Look for color to create interest

Color. Animals come in a very wide range of colors. Bright colors attract our attention in any image. Look for bright colors to add interest to your wildlife images.

That’s it for 8 quick tips for how to add interest to your wildlife images. Happy photographing!

7 More Tips for Your First Wedding Photography Job

Are you starting out in wedding photography and need some pointers? I have recently written two posts for people beginning in wedding photography. If you’d like to read those posts you can find them here.

Readers of those posts have asked me to add more tips for new wedding photographers – so here are 7 more tips for your first wedding photography job.

Tip #1 – Use Multiple Lenses. If you are shooting a wedding for the very first time, you possibly don’t have a wide range of camera bodies and lenses. If that’s the case, keep in mind that your images are going to have a level of ‘sameness’ about them if you only use one lens. You can’t expect a single lens to create a broad range of image types. So if you have limited gear, make sure you have at least 2-3 lenses on hand and that you have experience using them.

Tip #2 – Keep Cool and Calm, Manage Yourself. At a wedding, you will be judged on your behavior and the way you ‘carry yourself’. Only afterwards will you be judged on the images you produce. Every now and then you hear a wedding photographer horror story where guests say the photographer was rude or inconsiderate. Keep cool and calm. If you’ve just shot 6 horrible images in a row, nobody needs to know that. Remain calm and relaxed, position yourself and your subject and shoot the images again. Don’t panic, you are allowed to have plenty of ‘duds’ for your few ‘winners’. Make sure you present a calm, confident demeanor to guests. Keep cool. Keep calm. Manage yourself.

Wedding photography

Manage your clients expectations. Make sure the bride knows where you’ll be and when

Tip #3 – Manage Your Clients Expectations. As well as managing yourself, you will be wise to manage your bride and grooms expectations. Agree with them in advance where you will be and when. And then be in the right place at the right time. I put special emphasis on making sure the bride knows what will happen to her wedding photos after the big day. I tell her how long it will be until I am in touch with her, and what I will need her to do then. Make sure she knows what the process and timeframe is. Then stick to the process and timeframe. Manage your clients expectations.

Tip #4 – Change Cameras Not Lenses. In Tip #1 I suggested you are going to need multiple lenses to create a variety of images. You should definitely have more than one camera body. There are two reasons this is critical. Firstly, if you only have one camera body you run the risk that if you have any technical fault with the camera, you will be standing watching the ceremony unable to take any images. So the first reason to have an extra camera body – it is insurance against anything going wrong. Secondly, with 2 cameras, you won’t need to be constantly changing lenses. Simply pick up your other camera body and shoot a different style of image. If you can’t justify buying a second camera body at this stage, borrow one from a friend. It is worth it. Change cameras, not lenses.

Wedding photography

Kids can offer you great candid moments.

Tip #5 – Shoot Candids and Posed Images. When I speak to couples before the wedding, most of our discussions focus on the family formal pictures, the bridal party images, and the bride and groom images. We talk about style of image, location, and timings. We figure out the logistics of how to get between the locations. They are important discussions. When I present images to the bride and groom, more often than not, the ones that get the most emotional response are the candid images. Often it will be a moment, a hug, a facial expression. The couple normally can’t remember that exact moment until they see the image. Look for special moments and strong emotions. The mother of the bride crying, the bride embracing her grandmother, the grooms dad congratulating him with a bear hug. The raw emotion will be in the candid shots. Shoot both candid and posed images.

Tip #6 – Be Ready for Referral Opportunities. Weddings are a fantastic source of referrals for a photographer. At almost every wedding, I have people wanting to talk to me, either because they are photography enthusiasts or they have a photography need. Both can make for very interesting conversations. Take time to talk to people. Don’t brush them off because you are too busy or too stressed. Have your business cards in your shirt pocket, so if a wedding guest has a genuine photographic need, you can hand them a card and solve their problem. Be prepared. Weddings are a great source of referrals.

Wedding photography

Remember to congratulate the bride and groom

Tip #7 – Congratulate the Bride and Groom. What is the first thing you should do when you speak to the bride and groom after the ceremony? Is it to organize the family formals? Is it to ask where the best man is so he can assist you? Is it to ask what time the car will pick them up? No, it’s none of these! The first moment you get a chance, walk up to the bride and groom and say to them “Congratulations! That was a lovely ceremony.” It is a great thing to do and your clients will appreciate it. Human first, photographer second.

So there we are, 7 more tips for your first wedding photography job. Please let me know your comments by adding a comment to this post, or emailing me at craig@beyondhere.com.au And thanks to all the readers who emailed me after the first 7 tips.

If you’d like to automatically receive a weekly update from Beyond Here please sign up by adding your email address at the top of this page. Thank you for reading 7 more tips for your first wedding photography job.

7 Tips for Your First Wedding Photography Job

Number 7Last weekend I photographed a lovely wedding in the Yarra Valley in Victoria, Australia. I had a talented photographer assisting me – it was her first wedding photography job. Like all weddings, it was a challenging, exciting, and tiring day. We discussed many elements of shooting a wedding in the days prior, and on the day of the wedding. Today I condensed these into tips for your first wedding photography job. I listed all the tips and have come up with 28! But lets start with 7 tips for your first wedding photography job. Depending on reader feedback, I will add extra posts with additional tips.

Tip #1 – Expect a Long and Tiring Day. Wedding photography is often an all day event and you need to prepare for a long day. This weekend, we started at the bride’s house at 11am and left the reception just after 10.30pm. Expect a long day and pace yourself. Take something with you to eat. Drink plenty of water. Don’t expect the couple to provide everything for you. We took snacks and drinks in the car and had them as we travelled.

Tip #2 – Fit With the Couples Needs. I previously wrote a post called Preparing For Wedding Photography Success where I talked about the importance of knowing your client and what they want on their wedding day. You need to have prepared for this in advance. If the couple don’t like posed kissing shots – don’t ask them to pose and kiss. Fit in with what they want. If they want informal, documentary style wedding photography – that’s what you need to deliver. If formal family portraits are important to them – make sure you shoot formal family portraits. Deliver what the couple wants with your own unique approach.

Wedding

Surprise the bride and groom with a special image or print

Tip #3 – Know Where Your Gear Is. Weddings are busy. You will be carrying your gear and putting it down. Picking it up again, moving, putting it down again. It is critical to know where you gear is at all times. I carry a fairly small bag with all the equipment I expect to use in it. I have back up gear and additional equipment which I leave in the car. In my bag – each piece of equipment stays in one place. If I need additional batteries I know where they are. If I need a new memory card, I know where they are. If I need a different lens – it has its place and I know where to find it. Earlier this year I was at a wedding where the photographer was about to leave the bride’s house to go to the ceremony. He suddenly realized that he didn’t have his 70-200mm f2.8 lens with him. It wasn’t in his bag – he had left it in the bride’s house. The bride had locked the door when she left and the photographer couldn’t get back in. After several frantic phone calls, he got a key from a neighbor and was able to retrieve his lens. A happy ending to a very stressful few minutes. Once you have finished using a piece of equipment put it back in your bag – don’t leave it on the kitchen bench.

Tip #4 – Change Memory Cards and Batteries During Down Times. It looks really unprofessional to change your batteries or memory cards at a key moment in the wedding day – particularly during the ceremony. Change batteries and memory cards during the down times. For example, when you have shot all the ‘getting ready’ images and are driving to the ceremony – this is an ideal time to change batteries and memory cards. You don’t want to have a full memory card a moment before the couple are pronounced man and wife!

Tip #5 – Don’t Overshoot. It is an easy mistake for a beginner to make to overshoot – that is to take too many images. For example, when the bride is getting ready and doing her hair and make up, you need only a few key images. There is no point in having 50 shots of her hair being done if you are only going to use 1 in the album. Take the key shots you need. When you are confident you have an ‘A grade’ image, move on or take a quick break. Don’t overshoot.

Make Up

Don’t overshoot. Get your key shots and move on.

Plan sign

Plan your travel times and leave a buffer

Tip #6 – Plan Your Travel Times and Leave a Buffer. Travelling between locations can be very stressful if you don’t allow enough time. Last weekend, we started at the bride’s house, then traveled to where the groom was getting ready, went back to the bride’s house, and on to the venue for the ceremony and reception. They were all within fairly close proximity and so it was not too difficult. For a 30 minute drive I allow 40 minutes. Then a small delay in traffic or through road works are not enough to stress me out. Plan more time than you really need. Then you can check your shot list before you walk into the next venue.

Tip #7 – Surprise the Bride and Groom. I like to provide a positive surprise for the bride and groom to finish their wedding day. At the end of the day they will be feeling a sense of tiredness, relief, and excitement. I know some photographers who surprise them with a print. They take an image early in the day, and while the ceremony happens, they are having a print made. At the end of the reception the photographer presents it to them. I like to get home and pick a few key images. I quickly edit them and email them to the bride. She has a high quality image to show friends and family the next day. Often that image gets posted on social media the next day or carried on a smart phone and shown to friends and family during the honeymoon.

So there we are – 7 tips for your first wedding photography job. Please let me know your comments by adding a comment to this post, or emailing me at craig@beyondhere.com.au I have 21 more tips to follow!

If you’d like to automatically receive a weekly update from Beyond Here please sign up by adding your email address at the top of this page. Thank you for reading 7 tips for your first wedding photography job.

Preparing for Wedding Photography Success

Wedding photography can be challenging, exciting, stressful, exhilarating, and exhausting – all at once! I am shooting another wedding this weekend and have spent time making sure that I have everything in place to be able to perform at my best on the day. The more preparation I do before the wedding day, the less I have to worry about, and the better my images are. Rather than hoping for the best, I focus on preparing for wedding photography success. Here are some tips which might be useful to you.

Wedding Photography

Taking time to understand what your client is looking for is important

Sorry if you were hoping this would be a “what’s in the wedding photographer’s bag” type post. Instead, I’ve condensed my preparation into 7 checkpoints.

Checkpoint 1 – Do you really know your client?

Wedding Photography

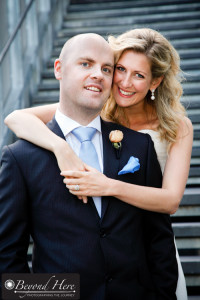
Meeting your client face to face helps to establish a relationship and helps you understand what they are looking for

Where it is possible I like to meet face to face with my client at the time they are selecting a photographer. It gives me a chance to make a personal connection with the bride and groom, to understand the dynamic between the couple, and to focus on what is important to them in their wedding photography. The couple I am shooting for this coming weekend, I met over a year ago at their home. We spent time discussing the wedding day and what was important to them. They are ‘car people’ and even showed me around the vehicles in the garage (this was a good sign they were planning to book me!). In the last 2 months I have been in touch with them via email and phone to understand how the wedding planning was going. Last weekend I visited them to go through the timings for the day and to re-visit the notes I made a year ago. I now have a good understanding of what is important to them, and am looking forward to the wedding.

Checkpoint 2 – Is the paperwork in order?

If you are thinking ‘what paperwork?’ you may need to do more preparation before launching your wedding photography career. It is ok to shoot your friends wedding without a contract, but for all other clients you will need a contract. Included are the terms and conditions of payment. My clients for this weekend have had a copy of their contract for over a year. They signed it at the time of the booking and paid in full 4 weeks ago. During the wedding I won’t be wondering if I am going to get paid. Don’t over look this checkpoint – it is key to preparing for wedding photography success and will go a long way to ensuring financial success as well as photographic success.

Checkpoint 3 – Have you visited the venues?

Wedding photography

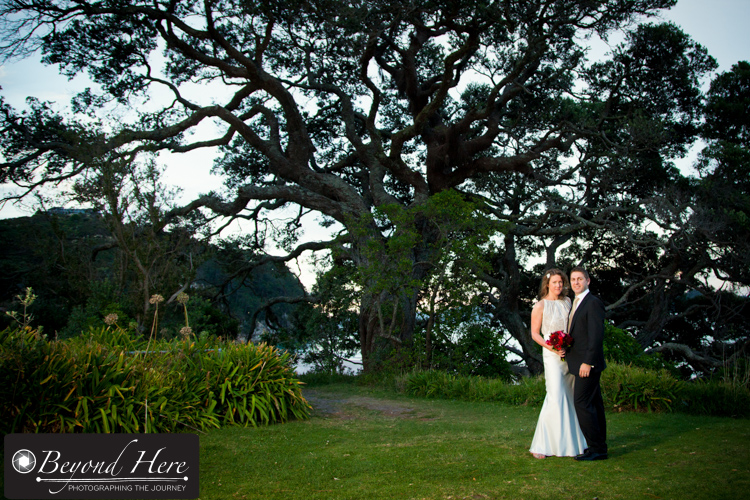
Visiting the venue lets you plan your key shots

It is very important to have visited the venue for the wedding in advance. It gives you time to look around and plan for where your key shots will take place. At the venue I will be shooting at next weekend, they display a range of sample albums. Looking through them also gave me some great ideas which other photographers have used. I now feel well prepared – particularly to make the most of the short time between the end of the ceremony and the start of the reception. I know which camera body and which lens I will be using at each location on the property. I know the style of shot which will suit my client. I know where my assistant will be and what she will be doing.

Checkpoint 4 – Are the logistics sorted out?

By logistics, I mean some of the practicalities of the day. For next weekends wedding there is a small chapel at the bottom of the property, and the reception venue is several hundred metres away. Thinking through the logistics, I will park the car near the chapel, as I will need to grab the step ladder for the ‘all guest’ shot. Rather than driving and re-parking I will walk up to the reception venue. No stress, I know where the car is. Car parking is just one element of the logistics. The more you can consider in advance, the less stress you will have on the day. Less stress generally means better images and happier clients.

Checkpoint 5 – Do you know the wedding party’s names?

The wedding party aren’t directly your clients, but they are normally family or the best friends of the bride and groom. Often they are lifelong friends. Taking the time to learn their names and using them, is one small way to show the bride and groom that you care about them and their day. It is not hard. I am looking forward to meeting Spiro – the best man – this weekend. If I strike up a good relationship with him early on the day, I might ask him to help with ‘crowd control’ after the ceremony. Often the best man loves to play a key role and it helps deal with his nerves if he is making a speech at the reception.

Checkpoint 6 – Which are the key shots?

It is easy to think on a wedding day that they are all key shots. What I mean here is, which are the shots you plan in advance which you anticipate the bride and groom will print and hang on their walls at home? Which shots capture the venue, the couple, and the day all in one? Based on what you know is important to the couple, which shots are going to mean the most to them? For my couple this weekend it will involve the grooms vehicle and driving into the future together. There will also be shots of the wedding party, candid moments, the ceremony, the guests, family formals, and kids being kids – but I anticipate the ‘winning shots’ to involve the bride and groom and the car. It will show their love for one another, a beautiful venue, and their passion for motor vehicles.

Checkpoint 7 – What is the weather forecast?

Wedding Photography

Checking the weather forecast gives you time to plan indoor and outdoor shots

If your wedding involves shooting outdoors during any part of the day, you will need to consider in advance what the weather forecast is. You can’t rely on beautiful soft light from a bright cloudy day for every wedding you shoot. What is the plan if there is bright sunlight? Or pouring rain? Or both within a few hours? Have you spoken to the venue to ask their advice on wet weather options? Late August can bring some very changeable and cold weather in Melbourne, Australia. Fortunately the forecast for this weekend is sunny, clear and cool. It should mean flexibility to shoot both indoor and outdoor images throughout the day. (I hope it is the same for the wedding I am shooting the following weekend!!)

I am a strong believer in preparing for wedding photography success. The more elements I have planned for in advance, the more I will be able to focus on photography on the big day. You don’t have to use my checklist, but I encourage you to plan in advance. Having a system in place gives you the best chance to shoot great wedding images and enjoy yourself at the same time. Invest the time in preparing for wedding photography success!

Photographing Babies

Recently on Beyond Here we had guest contributor Renate Hechter of Pure Dynamics Photography in Sydney, Australia contribute a post titled Newborn Photography Some Easy But Essential Tips. Coinciding with that, I had the opportunity to photograph a 6 week old baby. Photographing babies is always special, but this was more special as I had photographed the parents wedding in 2012. Here is an outline of how the shoot went, and some insights and tips for photographing babies.

Baby Photography

Work to baby’s needs. If baby wants to stay in mum’s arms, let him or her.

Preparation. We organised the shoot to be in the morning to fit in with baby’s normal routine. We discussed clothing before the shoot, and the parents brought several changes of clothes for baby and for themselves. We concentrated on solid colours which would look good in colour or black and white. We avoided patterns.

The session was held in my studio and in preparation I made sure we had:

  • the heater on, so the room was nice and warm
  • a place where the parents could put their bag
  • a chair where mum could feed baby
  • back drops in place and ready to go
  • lighting in place and ready to go
  • a bean bag handy which we could position baby on
  • 2 camera bodies with lenses on, to save on time changing lenses

Baby Photography

Converting images to black and white helps keep focus on baby and not on any minor imperfections

On the Day. When the clients arrived the baby was wide awake and looking very alert for a 6 week old! It must have been all the new sights and sounds and smells. However, despite all our best preparations baby was reasonably unsettled throughout the shoot. While he was fed several times and kept nice and warm, it was just one of those days where he had other things on his mind apart from being the ‘perfect model’. Not to worry! This is quite normal for really little babies and so it important to remain relaxed – and to keep mum and dad relaxed. In this case, mum and dad were well prepared and not in a hurry so we did have time, and enough cooperation from the model, to get them some ‘A’ grade images.

Shot Plan. I plan my shots and poses before the client arrives and make sure I have any equipment on hand. That is helpful for making the most of the time, but it is more important to remain flexible. If baby wants to stay in mum’s arms – let him or her. There will be time to do all the shots planned, they will just need to be done in an order and a time which baby is happy with.

The Results. Don’t worry – this story has a good end. Firstly, we all had a relaxed and enjoyable time. Baby wasn’t the perfect model, but we all had fun and we have finished with a number of ‘A’ grade images for the family. This was a good reminder to not get stressed if baby is not perfect. You will have a short window of opportunity when baby is settled to get those images you need. Be patient and be ready.

Baby photography

A hat or beanie helps make a baby’s head look normal and to keep warm

Insights. There were several things which went really well from this shoot that are worth taking as insights or tips. They were:

  • ask parents to bring several changes of clothes for baby and themselves. At this shoot, baby had a “call of nature” on his dad. Dad had a change of clothes, so we had no problems and a funny story to tell!
  • include several hats or beanies for baby. A baby’s head can look disproportionately large compared to its body. A hat will make it look in proportion
  • be flexible. This was essential in this session. We worked to baby’s routine and got a good outcome
  • relax. It helps the parents relax too. They need to have an enjoyable time as well as having nice images
  • it’s not about volume. You don’t need hundreds of great shots for very little ones. This shoot is capturing a moment in time, and a handful of good images will do that
  • convert images to black and white. Black and white is very effective in newborn photography. It helps to focus on the beautiful little parcel, and not on skin imperfections or colouring

Do you have a story to tell from photographing babies? Key lessons learnt? Tips for good outcomes?

Make the Most of Your Flash

Have you heard that your flash photography will improve dramatically if you use your flash off the camera? Believe me – it will. In this post I outline how to make the most of your flash by using it off camera.

So, how do we use the flash off the camera? In an earlier post I explained How To Use Flash Triggers (thanks to the readers who emailed me with positive feedback about that post). Flash triggers enable us to fire the flash when it is off the camera. With 3 other simple pieces of equipment you will be able to create images with soft, directional flash light. When you master this, you will really make the most of your flash!

Adapter

Attach the adapter to the top of the light stand

What equipment do I need? In addition to the radio triggers you will need:

  • a light stand
  • an adapter
  • a shoot through umbrella

First, you will need a light stand. This enables you to position the light at whatever height and distance from the subject you like. Second, you will need an adapter. This is the small piece of equipment which attaches to the top of your light stand. It allows the flash to sit on top of it. It also has a hole through it for the umbrella to fit in. Thirdly, you will need something to spread and soften the light. You can use a reflective umbrella or a shoot through umbrella. My preference is the shoot through umbrella as I find it enables better control of the light.

Flash

Attach the flash unit to the top of the adapter

How do I set it up?

(1) attach one of your flash triggers to the camera, and one to the flash
(2) set up your light stand
(3) attach the adapter to the connection point on top of the light stand
(4) attach the flash (with trigger attached) to the adapter
(5) thread the umbrella through the hole in the adapter

Now that you have this set up, you can position the light relative to the subject. If you don’t like how your subject is lit, move the light or adjust the power from the flash. Now, instead of being stuck with the flash on the camera, you can use your flash anywhere! This is how to make the most of your flash! (This is a one light setup, for additional light sources replicate the process for multiple lights).

What does it cost? This is a hard question to answer and depends where you live and where you like to shop! I live in Australia and buy most of my equipment at an online store. At that store there is currently a special offer which includes 2 radio triggers, a reflective umbrella, a light stand and an adapter, for A$140.

Off camera flash

The final set up

What next? To build on this lighting set up you can add a portable background. Once you have a background, you effectively have a simple, portable studio. I use this set up when doing corporate portraits in an office environment.

If you have questions about this set up, please feel free to add a comment to this post, or email me at craig@beyondhere.com.au

I hope this post has been useful and will encourage you to take the flash off the camera and make the most of your flash!