Tag Archives: portrait photography

Great Location Great Options

If you are shooting weddings, portraits, or stock – the venue you choose will have a significant impact on both the style and variety of images you can produce. Some venues only allow for one style of image, while others will allow for multiple different styles. For maximum variety and impact, I’m looking for the double – Great Location Great Options.
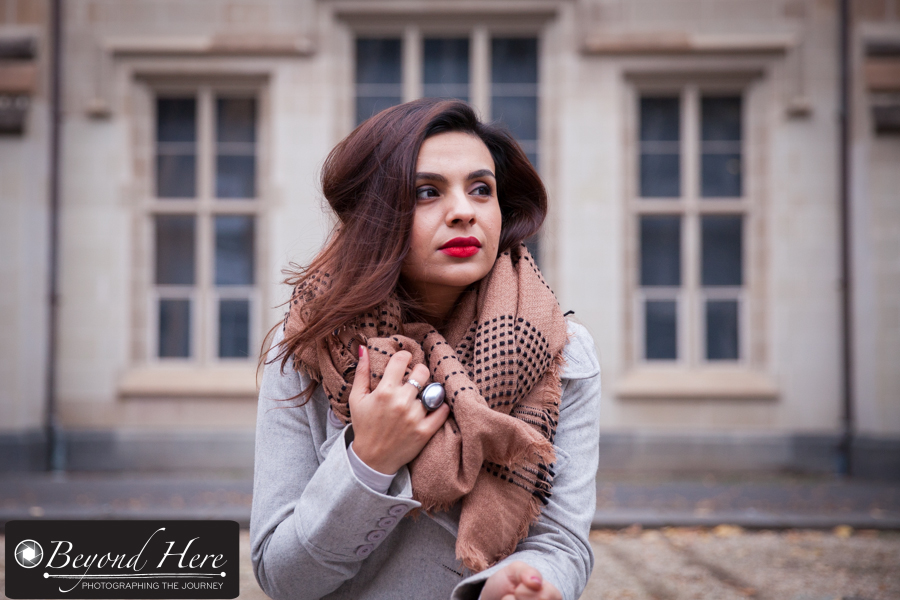
Winter portrait

Take time to research your venue. It will lead to more successful shoots.

For this shoot with Ayona we were shooting with a dual purpose – the images were going to be used on her fashion blog (Her Style Saga) and also in my stock portfolio.
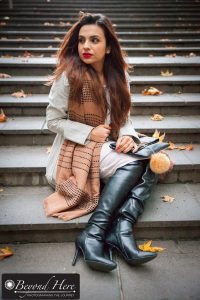

Woman on stairs

Large stairways always provide options and the leaves add to the wintery feel

I had wanted to shoot at this venue for some time, as I love the old architecture and building facades. I visited the venue twice before the shoot to check which locations would be suitable, and to see how the light would fall in the late afternoon when we were shooting.

That research made me realize there were a wealth of different options within short walking distance.

There were areas which showcased archways and classic architecture, others with beautiful building facades, some with park backgrounds, and yet others with fallen leaves which highlighted the late autumn, early winter time of year.

This was a venue with lots and lots of options (I liked it so much, I’ve already done another shoot there!)

So, what should you look for in locations?

Point 1 – Backgrounds which will add impact. I look for buildings or landscapes or architecture which will give a real sense of presence to the image. I want to add to the impact. This set of images was about a young woman and her passion for fashion. It could be shot in the studio, but there was more impact shooting outdoor. And in an outdoor venue, I wanted to be able to create a set of different images in a short space of time. That leads us to point 2.
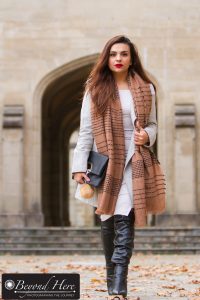
Woman walking

Arches, classic architecture, fashion, and an overcast day are a great combination

Point 2 – look for venues with variety. I don’t want all my images from a shoot to look the same. This is particularly the case for wedding photography and stock photography where I am expecting to shoot and use a large number of images. So I don’t want all the same backgrounds.

I want to be able to easily move (ideally walk) between different areas which will give me different looking images. In this case, all the venues we used were within 5 minutes walk of each other. For me, that is perfect! The entire shoot lasted for less than 90 minutes and we produced a wide variety of images.

Point 3 – the location needs to be free from over crowding. To be able to shoot in a public space, you need a venue which will not be overcrowded. I didn’t want people wandering through the background of my images, so we chose to shoot on a Sunday afternoon on a fairly cool early winters day.

It was cool, but the wintery conditions meant we didn’t often have to pause for people to walk through the background where we were shooting. All the people were inside keeping warm!
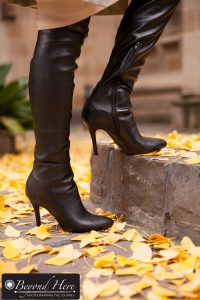
Boots

Fallen leaves and leather boots added to the wintery feel.

Point 4 – choose venues with good accessibility and parking. This venue is about 25 minutes drive from where I live, which I would call fairly close to home. It is in a built up area and parking can be difficult during the week. So we chose to shoot on the weekend when we both had availability, knowing that the location would not be too crowded and we wouldn’t have much trouble finding a car park.

If you haven’t been putting much time and research into choosing locations, perhaps you should take a lesson from the advertising industry. In planning for TV commercials, ad agency staff spend hours and hours researching the perfect venues to support the story they are looking to tell. If you are a photographer shooting weddings, portraits or stock, perhaps you should spend more time researching venues to help you produce really strong images?
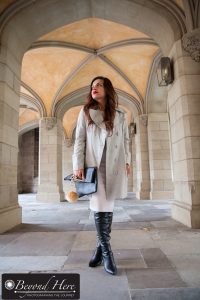
Architecture

Architecture can add impact

As well as Great Location Great Options, you need a good model to work with. Thank you to Ayona who was a very easy person to work with, and the shoot was a lot of fun.

If you would like to check out the images Ayona selected for her blog, or if you just love fashion – visit her blog out at Her Style Saga.

Thanks for taking the time to read Great Location Great Options.

Use Recognizable Backgrounds to Add Impact

There has long been a place (and a market!) for images shot in a studio on a plain background – just ask any established studio photographer. Studio images on plain backgrounds help to focus you entirely on the subject. But what if you are looking to bring a more contemporary look to your images? Have you tried to use recognizable backgrounds to add impact? And by backgrounds, I don’t mean studio backdrops – I mean real locations.

Why do recognizable backgrounds help to make a strong image? Recognizable backgrounds add location and meaning to an image. They create a connection with the viewer who will often know the exact location the image has been shot at, and may have even stood in the exact same location.

Flinders St Station

People who know Melbourne will instantly recognize this location

In this image, people who know Melbourne, Australia will instantly recognize this as the front entrance to the Flinders Street Railway Station on the corner of Flinders Street and Swanston Street. The location adds a distinct local flavor, and creates a connection with the viewer. Many people have stood in this exact location.

Why is this an opportunity for your photography business? Demand for images shot in the studio and isolated on white is falling, and demand for real people in real locations (including recognizable locations!) is booming. It is about creating genuine images which the viewer can relate to. Real people, real locations.

Parliament buildings

It’s possible to shoot in a variety of locations in a single shoot

Here are seven quick reasons why you might want to catch this wave.

  • clients love to shoot images which connect them to the location. Whether it’s permanent residents or travelers, people have an emotional connection to their home town, whether it’s a permanent or temporary home town.
  • locations look different at different times of year. Use the seasons to your advantage and shoot different styles in different seasons. Think how you could use this to shoot different images of the same client at different times of year?
  • if you are starting out, you can shoot this style of image with minimal cost. You may want a reflector or two, but you won’t incur the costs of setting up a studio when you shoot this type of image. This can be a very cost effective way to build a portrait business or stock portfolio.
  • demand for ‘local’ stock images is growing rapidly. Stock buyers are moving away from images which could have been shot anywhere, to images which clearly have context and location. If you are interested in driving your stock photo sales, shoot local and make it clear that the images have context and location.
  • shooting images on location is fun. I find it really enjoyable walking around my hometown finding new locations and shooting interesting local images. Often you can generate a very wide variety of images in a short period of time.
  • there is an almost limitless range of possible locations. I am shooting a stock photography series using locations in my home town. I started by writing down some locations to use, and ended up with a list of ideas three pages long! You won’t run out of locations to shoot at. Think creatively and you will be able to generate a huge range of shoot locations.
  • clients love to share location images on social media. This can only be good for business.

Thanks for reading this post. I hope you can use recognizable backgrounds to create some cool images and benefit your photography business. Happy shooting.

How to Find Models to Work With

Making the step from working with friends and family, to photographing clients, through to working with models are big steps in a photographers career. They are also challenging steps unless you have a network of appropriate people to shoot with. This post – How to Find Models to Work With – details ways for you to source models for your shoot.

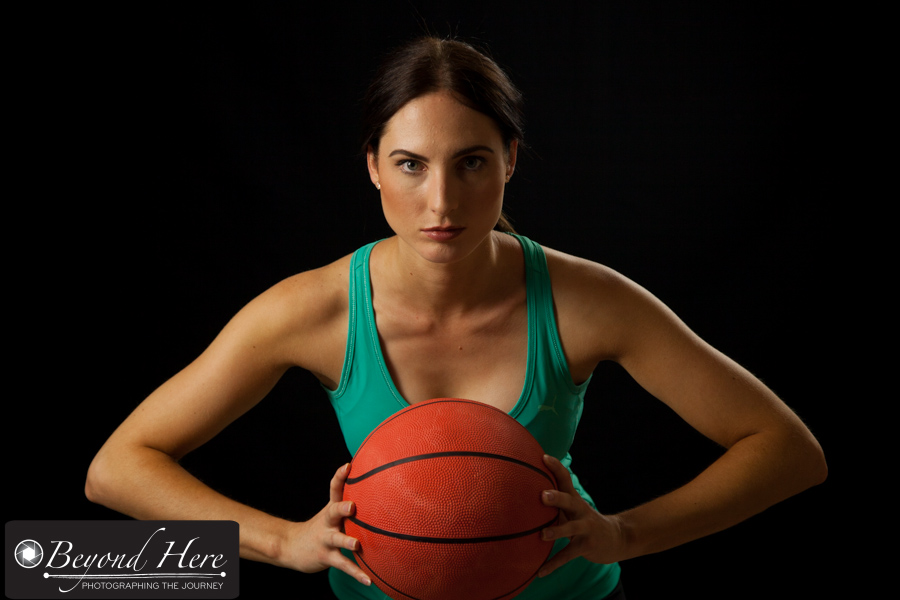
basketball

Facebook groups and specialist sites are great places to connect with other creatives

Facebook. If you are a Facebook user and live in a place with a reasonable population, there is likely to already be a Facebook group set up which will help you.

As I’m writing this post I’ve gone to the Facebook search field and entered “Sydney models” and it has proposed a series of relevant groups.

As I scan down them I can see one called ‘Sydney Models / Photographers / HMUA’ which currently has 3716 members. So what is this? It is a group of models, photographers, and hair and make up artists (HMUA) who participate together in the group.

They make requests for relevant services, share work, put forward their name for shoots, and use the Facebook group as a place to find other creatives to work with.

Specialist Sites. There are also specialist web sites which create communities of creatives. The two that I am most familiar with are Model Mayhem and StarNow. Go ahead and check them out. It is free to set up a profile on each of them, and like the Facebook groups, they are a place for creatives to come together.

How should a photographer use these communities? Start by setting up a profile and include details of what you are looking for from people visiting your profile. I am a stock photographer, so my profile includes details to let people know the projects I am working on, and the type of creatives I would like to contact me.

Secondly, there is the opportunity to share your work. Add images to your profile so visitors can assess the style and quality of your work.

Thirdly, each of these communities have the ability to post a ‘casting call’. That is, you put forward details of your shoot, and ask people who are interested to get in contact with you.

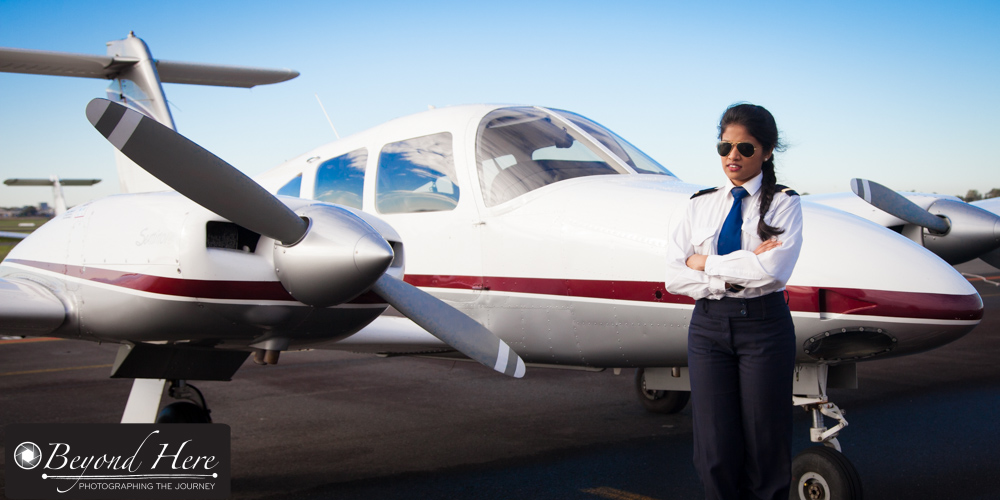
Pilot

Include all relevant information in your casting call to help get qualified responses

What information should you include in a casting call? The short answer is – as much information as possible. Consider these points as a minimum:

  • when is the shoot? Include the date and time
  • where is the shoot? Be specific. A suburb is better than just the city name.
  • how long do you anticipate the shoot will go for?
  • is it indoor or outdoor? Studio or natural light?
  • is the shoot paid or TFP (time for print, or time for portfolio)?
  • what is the shoot concept?
  • what special requirements do you have? (for example, if you are looking for a model of specific cultural background and with long hair, be sure to specify that in the casting call)
  • who is doing hair and makeup? A HMUA? or do you want the model to do their own?

If you were not sure how to find models to work with, I hope this post has helped you.

If you already use these sites or others, what is your experience? Which sites generate the best response for you?

Thanks for reading – how to find models to shoot with. Happy shooting.

How to Reward Repeat Customers

I recently met with a photographer here in Melbourne, Australia who is in the early stages of his photography business. He has made a good start and is clear on his target market (head shots for actors). Interestingly he was considering offering discounts to clients who update their head shots regularly. That led me to consider the broader client issue of how to reward repeat customers?

Let’s start by considering what a customer goes through before a shoot.

Often for actors or business people, they are going to use their images as part of a pitch for a job or a role. The images are part of the impact their application will make, and it is important. A strong, well lit image can assist in making a first impression and helping to get a face to face meeting. Ultimately it helps in whether they get the part or job.

Now let’s think about the mental questions the client goes through before a shoot. The following things will be going through the clients mind either consciously or subconsciously – is this photographer any good? do they know about lighting and can make me look good? will this be value for money? will this be fun? will I get a range of images which I can use in different situations? will this be an ordeal which I regret? is my hair and make up ok? They are not very positive questions! Most of my clients know they need good quality images, but start the process with this range of concerns and doubts.

client

Put yourself in your clients shoes to determine what additional service you can provide

So what about after the shoot? The most common feedback I receive about the experience of the shoot is – that was fun, that was easier than I expected, and I felt relaxed in front of the camera. And of course, the client receives a range of high quality images to use.

So, should you offer a discount to repeat customers? Everyone will have their own opinion on this, so please take this as just one point of view. I don’t offer discounts to repeat customers because they already know and have experienced that:

  • they will receive high quality images
  • the shoot will be relaxed and fun
  • the shoot experience will not be difficult
  • I can adjust the length of the shoot to meet their needs on the day

So why would I offer a lower price to people who have that peace of mind? They already know the process of the shoot and don’t have the concerns of someone you haven’t worked with before. I want my business filled with repeat customers, but won’t be able to afford to do that if I am always offering them a cheaper price than new clients.

save time

A short, stress-free shoot may be more important to your customer than the price

So how to reward repeat customers? As I’ve outlined, I don’t use price as a reward mechanism for repeat customers – I use service. As an existing customer of mine I look for all possible ways to offer a high level of service. Here are some examples:

  • short notice bookings. If an existing customer needs some shots done at short notice, I will move other shoots and appointments to meet the time frame they need.
  • prints. Often my clients need printed images. I will do all I can to help them with prints. Again I don’t discount these, but I save my clients the time and inconvenience of doing it themselves.
  • on location. If we have already done a studio shoot, I offer to do the next shoot on location. It might be at their work or home (usually their work place) so that their image can be taken in the context of their business.
  • file sizes. I ask what the images will be used for and make sure the images I deliver are ready to use. If an image is urgently needed for a LinkedIn profile, I will email the image in the correct dimensions at 72dpi ready to be uploaded to my clients profile. I aim to make life easy for my client and to deliver a level of service which is worth paying for
  • family portraits. I find that most people intend to do family portraits but never quite get around to it. For clients where I have shot business portraits, I offer to shoot family portraits for them too. I make it easy. They know and trust me, and know I’ll make the shoot fun and light-hearted

I hope this has given you a different perspective on how to reward repeat customers. Leave your prices and look really hard at what additional services you can provide. Thanks for reading how to reward repeat customers.

Starting Out With Light Modifiers

Many readers of Beyond Here are wanting to take the step into the professional photography ranks. They are looking to make photography a significant part of their income, and then make it their main source of income. Making that leap often means learning the skills and having the equipment to shoot multiple days of the week and in different lighting conditions. In many cases this will bring an ‘outdoor’ photographer indoor where they will need a range of lighting equipment, and the skills to use them. In this post we look at starting out with light modifiers. Here is an overview of the basic equipment.

Portrait

This image was shot with a single soft box to the left of camera

Reflector – a reflector is a very simple piece of equipment. They are straightforward to use and simply reflect the existing light. They come in silver and gold which create different levels of ‘warmth’ in the light. Reflectors come in a range of sizes and are cheap and worth having.

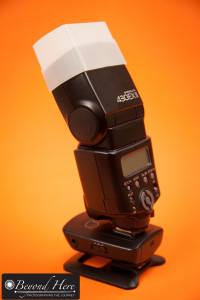
Diffuser

The simplest light modifier is a diffuser for a speedlite

Speedlite Diffuser – a speedlite diffuser is the most basic type of light modifier. They come in various forms, but the most simple is a piece of plastic which fits over the head of the speedlite. They are surprisingly effective in softening the light from your speedlite. They are very cheap and worth getting. The speedlite shown in the diagram is being used off camera. If you have never used your speedlite off camera, please see this post. Learning to use your speedlite off camera and softening the light will open up a new world of lighting opportunities for you.

Reflective Umbrella – umbrellas are ideal for creating soft light across a large area, which makes them useful for lighting groups of people. They are cheap and easy to use. The only disadvantage is that they tend to spread lots of light around. Like the reflector, reflective umbrellas come in different colors – silver, gold and white.

Shoot through umbrella

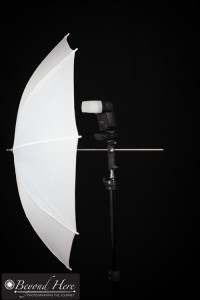
A simple set up for a speedlite to be fired through a shoot through umbrella

White Shoot Through Umbrella – shoot through umbrellas are great for diffusing light and spreading it evenly. They are simple to use, and as the name implies, you shoot the light through the translucent umbrella. They come in different sizes, so keep in mind that the light will be softer when coming from a larger source. Shoot through umbrellas and reflective umbrellas are very easy to use in an indoor environment. An example is in this post. Be very wary of using umbrellas outdoor. Even a very small gust of wind will catch the umbrella and blow your equipment over.

Scrims – a scrim is a square or rectangular frame with diffusion fabric spread across it. They are typically larger than umbrellas and can be used to create large areas of diffused light. Use a scrim to diffuse light from flash, continuous lights, or the sun.

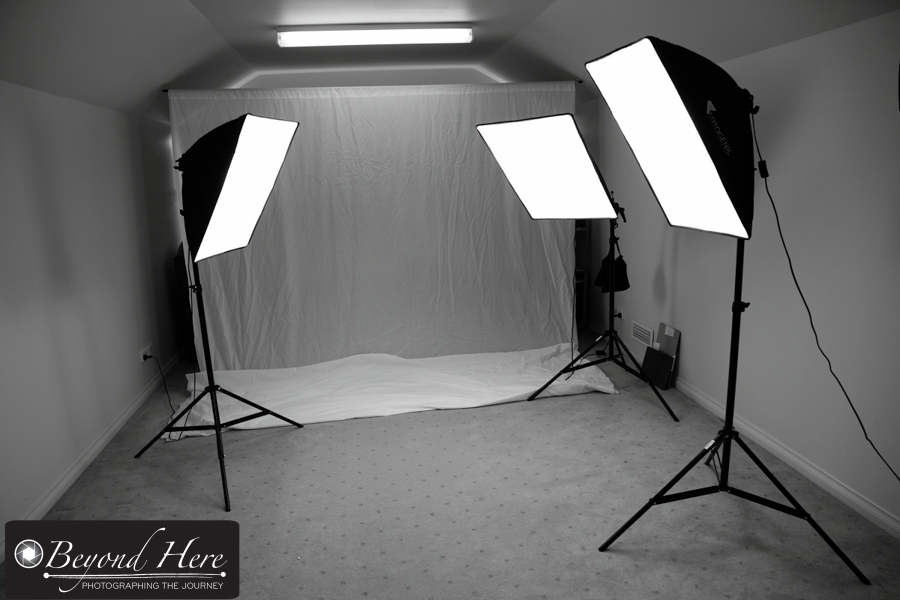
Soft box – soft boxes give the photographer more control of light than umbrellas. Soft boxes are what I use most frequently in the studio environment. They are simple to use and avoid light spreading everywhere in the studio environment. Soft boxes come in a range of different sizes from small to very large. Choose which is most appropriate for your lighting needs and your space.

Soft boxes

An example of soft boxes in a simple studio environment

That covers the very basics of starting out with light modifiers. This post only touches the surface of a large subject. I’ve done it without mentioning beauty dishes, gridspots, Fresnel lights, or an octabox! Thanks for reading starting out with light modifiers. I hope it has demystified light modifiers and given you the encouragement to begin modifying your light.

What Do You Need for a Mobile Photography Studio

Producing high quality portraits in different environments can be challenging. There can be issues with lighting, backgrounds, even models! So, how do we have the best chance of creating strong portraits – we take our equipment with us. What do you need for a mobile photography studio? Read on.

Single light portrait

This portrait was shot with a single light to the right of camera

Here I have outlined the minimum gear you will need to have a mobile studio. Sorry, if you were hoping I’d give you reasons to buy thousands of dollars worth of new gear! I have taken the opposite approach – and will show you just how affordable it can be to have simple mobile equipment which will allow you to shoot strong portraits in different locations. As you will see this set up is best suited to indoor conditions where you are trying to generate professional quality light with the minimum of fuss and effort. First, we need a light source. The simplest way is to have one external flash unit. Not the pop up flash on the top of some cameras, but a separate flash unit. This will enable us to control the level and direction of light in any situation. Most readers of Beyond Here will already have an external flash unit, but if you don’t, you should consider getting one. You really can’t produce excellent quality portraits using pop up flash. Once you do have an external flash unit, you will have flexibility in how you light your subject.

flash photography

A flash unit and radio trigger mounted on a light stand

Once we have a light source we need to know how to use it! For simple portraits we want just one light, but we will need a light stand to put it on. Once we have a light stand we can position the light anywhere relative to our subject. At the online camera store I use, you can currently buy a 1.8m light stand for $30. Light stands are very handy, and pack up to a manageable size to carry. Mine fit inside a small bag, making them easy to transport.

Ok, we have a flash unit and a light stand. What’s next? The light produced from a single flash unit will be harsh. To create high quality portraits we need something to soften the light from our flash unit. For this, I mainly use a shoot through umbrella. A 33 inch umbrella at my favorite online store is currently $35 (though they are often much cheaper than this. Bring on the sales!) When we fire the flash through the shoot through umbrella it will produce a soft, flattering light.

flash

The umbrella fits into the swivel adapter

To mount the camera and umbrella we need a simple adapter which fits on the end of the light stand. If you haven’t done this before, it is this piece of equipment which often gets overlooked. It is often referred to as a ‘swivel umbrella adapter’. The current price at the online store I use is $34. Look out for them in your camera store.

The final piece of the lighting puzzle comes with having something to fire the flash while it is off the camera. A simple option here is a radio trigger (I wrote a separate post here about how to use flash triggers). To make radio triggers work you place one in the hot shoe of your camera, and attach your flash unit to the other one. When you press the shutter button the trigger on your camera sends a signal to the other trigger, and fires the flash. Cool eh? A pair of radio triggers is currently just over $100, though you can get them for half this price when they are on sale.

With this small amount of equipment you are now ready to go. The equipment is easy to carry, with the light stand being the bulkiest item.

(If you want to be able to control your background as well, you can buy a ‘pop up’ background. I have one of these which is black on one side and white on the other, cost $100. It is useful, particularly for shooting corporate portraits on a black background. If you are not ready to buy one, look for a plain wall to use as your background and position your subject 2-3 meters from the wall.)

So there you have it – what do you need for a mobile photography studio – in a few easy steps. Note, this set up works very well in indoor situations. If you are using it outdoors, be careful with the shoot through umbrella. Even a small amount of wind will catch the umbrella and blow your light stand over. Not a good look!

Thanks for reading ‘what do you need for a mobile photography studio’.

6 Alternatives to Price Discounts for Family Photographers

I follow a range of family photographers and their portfolios via Facebook. Commonly I see many of them offering price discounts to encourage new clients to book now. Do you take this approach? I am going to offer you a different approach and will show you 6 alternatives to price discounts for family photographers.

But first, why might price discounts not be a good idea for your family photography business in the long run?

Sale

Continuous price discounting will attract very price sensitive clients. Is this the type of client you want?

As photographers, our skill and the quality of our work increases over time. Typically our costs go up over time as well, as we upgrade to new equipment, new computers, and costs for insurance and other necessities rise. So, unless we want to work a lot longer hours in future, our prices need to increase over time as well.

So why is price discounting not such a good strategy?

  • Price discounting focuses your clients on your prices and not on the quality of your work. I don’t know about you, but I want my clients to be excited about the quality of the work, how it will capture the moment of their child’s early steps, and how a large print might hang on the walls of their home for a lifetime. I don’t want them thinking about saving $50 off my usual rates. If the quality of the work is strong enough, the $50 will not matter.
  • If you are a habitual price discounter you can be sure that any clients that have paid your full rates will not be very happy. If your usual family portrait rates are $500, the client who paid $500 last week will not be very pleased when she sees the same package advertised on your facebook page this week for $350.
  • And further to that, any potential clients who follow your work will never book at your full rates as you are conditioning them to wait for your regular “Hey world! I’m on sale” posts on your facebook photography page. If you regularly discount, you are essentially cutting your rates. Is that what you want in the long term?

So how do we attract new clients now, and fill the gap in our shooting schedule, without constant price discounts?

Here are ‘6 alternatives to price discounts for family photographers’.

1. Add Value. Instead of offering price discounts, make offers which add more value for your client. If your basic package is $500 offer a ‘Summer Special’ which includes a large canvas print valued at $150 for a package price of $575. The idea here is to present a ‘value offer’ not a ‘cheap offer’.

2. Solve a Client Problem. This is one which can be adjusted for any “hard to buy a present for” family member. For example, “What do you buy your partner for his birthday? He has everything right? Surprise him with a photo of you. Booking available from now until the end of the month”.

3. Build a High Value Package. Building a high value package works in a similar way to the ‘add value’ alternative. But here we add lots of extra things to the package. Let’s show you an example – “Looking for presents for the entire extended family? And would like prints to decorate your own home too? Complete you family portrait shoot before 15 June and receive a 36 x 24 inch canvas, two 12 x 18 inch prints, five 8 x10 inch prints, and a USB of your images, all for $695”

Idea

Here are 6 different ideas for promoting your business without positioning yourself as cheap

4. Guarantee turnaround times. Most people have busy lives and often leave things to the last minute. This alternative recognizes that and helps make your client’s lives easier. “It’s not too late for the perfect personalized Christmas present! Complete your family portrait session before 30 November, and receive your prints and images by 18 December. Book now!” Note, that in this alternative there is no mention of price. It is all about recognizing people are busy and solving their Christmas present challenges. (I have found that clients who like you to solve the problem this year, will also like you to solve the problem again next year. They are time sensitive, not price sensitive.)

5. Make tailored offers to previous clients. Your previous clients are a fantastic source of future business. You have a relationship with them and they like your work. This makes them ideal to approach for tailored offers. Here is a sample email “Hi (existing client), I was looking back over my work from last year and realised that it is nearly a year since I did your family portraits. I wonder if you would like to make a record of your family’s images a year later? I currently have a gap in my shooting schedule on (XX date). Would you like to book an anniversary shoot?”

6. Discount only for your special clients. And the final alternative is for those people who just can’t resist offering a price discount. If you feel you really must do this – don’t broadcast it to the world. Don’t create the impression that you are a cheap photographer who is always offering discounts. Keep your clients focused on quality. So what do we do?

Go to your ‘special’ clients or repeat clients who you know will respond to the offer. A sample email might look like “Hi Amanda, I’ve got a booking time available next Wednesday morning at 10am. I know it is short notice, but wondered if you would like to bring the kids and do a 60 minute shoot? My normal price is $500, but for you as a loyal client I’d be happy to take 20% off this.”

Continually offering price discounts will lead you down a path of attracting clients who focus on price. There is another way. Thanks for reading 6 alternatives to price discounts for family photographers. I hope it has given your some tools to escape the trap of constant price discounting. If you would like to receive updates from Beyond Here, please add your email address in the sign up area on this page.


Making This Image

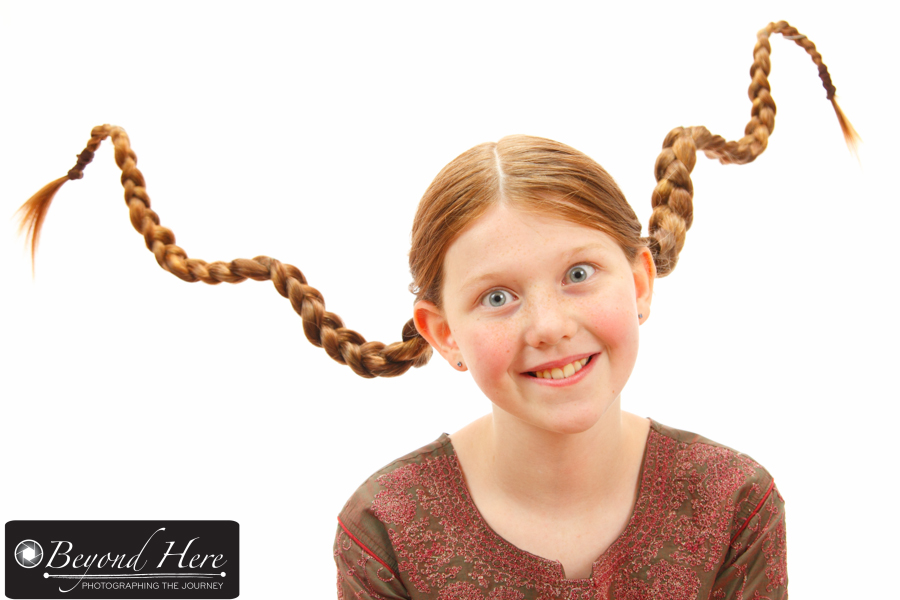
I had a canvas print of this image on my studio wall before it went to the client. It drew lots of questions about how it was created. How did I make her hair go like that? How do you get a pure white background? Is that shape real? And lots more. Below I have outlined the steps in making this image.

Portrait Photography

Unique portraits like this one don’t need to be complex or very time consuming

Step 1 – Plaits. This young lady has very, very long hair. She is tall and it goes all the way down her back. Step 1 was to get her mum to plait it. I didn’t see this part, but it must have taken some time for such long hair!

Step 2 – Studio set up. This shot was taken in studio, against a white background. I have written an earlier post about how to get a pure white background. If you don’t have a studio backdrop you can achieve the same effect with a white wall or nearly white wall. I had two lights with small soft boxes on them positioned on left and right at 45 degrees to the subject. You can see the catch-lights from those in her eyes.

Step 3 – Shaping the hair. In this image, I was aiming for a fun / quirky image. To shape her hair – we improvised! We unwound a wire coat hangar and threaded it through the middle of her plait. That made it possible to create a range of different shapes from her plait. The coat hangar protruded out of her hair. In this image it protruded to the left, where her mother was holding it.

Step 4 – Removing the visible part of the coat hangar. In each of this small series of images, part of the coat hangar was visible. It stuck out from her hair, and out of frame where her mum was holding it. To remove the coat hangar wire from the image required less than 5 minutes in post production, using the stamp tool to replace the wire with pure white from the background.

It does not need a long tedious studio session and hours in post production to make interesting images. This one took about 20 minutes from beginning to end (after her hair was plaited!!) I hope this was helpful to you, and that you understand the process for making this image. Do you have a story to tell about making unique portraits?

Making Unique Portraits

In this post we look at an example of making unique portraits without spending hours in post production.

For this stock photography shoot, the model had very long red hair. We decided to make a feature of her long hair, to make an interesting and unique series of images.

Unique portrait

A unique portrait created using fishing line and parental support

How did we set about making these unique portraits? For the first portrait, we took her plaited hair and attached several pieces of fishing line at different intervals along the length of her hair. Her parents stood on each side of her, holding the fishing line. Then it was a matter of raising or lowering the different sections to achieve the wavy pattern. The total time to shoot this image was about 15 minutes. That consisted of preparing the fishing line, attaching it, and then taking a series of images to get the right look. What about post production? There were small parts of the fishing line visible in her hair and against the white background. These took about 5 minutes to remove in post production. There you have it, making unique portraits version one.

For the second image, the idea was similar, but the execution was different.

Unique studio portrait

Unique portrait created using a coat hangar threaded through her hair

In this case, we unwound a wire coat hanger, and threaded it through the models hair. This time, her hair was in a single plait. This made it possible to create more solid shapes out of her hair – in this case a large question mark. Once the shape was formed in the hair, again a parent held the coat hanger – which protruded from her hair. This one took longer to make. The coat hangar had to be threaded through the models hair, then shaped appropriately, and then the images taken. This took approximately 30 minutes and I was grateful for a very patient model. Again, about 5 minutes was required in post production to remove the coat hanger and parents hand which were visible in the corner of the shot.

There you go,  making unique portraits without spending hours in post production.

If you have found this interesting, you may be interested in these related posts:

Do you have a story to share about creating unique portraits? Please add a comment to this post.

Portrait Photography Tips Fill The Frame

Do you want to improve your portrait photography? An almost universal rule for taking more compelling portrait images is to fill the frame with your subject. That means getting closer to the subject (or zooming in closer) so that the subject entirely fills the frame.

It doesn’t matter whether the subject is people, animals, or objects – fill the frame with the subject for more interesting images. This can feel a little funny at first, particularly as you move in closer than you normally feel comfortable. Push through the discomfort – it will be worth it and your portrait photography will benefit.

I find the best way to do this is to stand much closer to the subject than you normally would. If you are feeling uncomfortable, like someone is in your personal space, then you are in the right spot.

Why does this work?

Filling the frame with your subject creates more compelling images because:

  • it focuses the viewer completely on the subject, and
  • it removes any distracting background elements

Show me an example!

Portait where the subject fills the frame

Portait where the subject fills the frame

Here is an example of a children’s portrait.

It was shot indoor, with a large glass window behind me. The window was not in direct sunlight, so it was producing very soft natural light across the subject. The room contained furniture and children’s toys. These are normal elements in a home with children but they have the potential to distract your viewer if you include them in your image.

In this case, although I was using a 24-105mm lens, I didn’t need to use the zoom right to the 105mm end of the range. I was close to the subject and managed to fill the frame completely with the subject. The result – a simple compelling portrait photograph (which doesn’t show the clutter and mess in the room around them.)

This is one of my favorite portrait photography tips.

How do you find standing close to the subject and filling the frame? Do you find it more effective to position yourself close to the subject, or a little further back with some zoom?