Tag Archives: portrait photography tips

How to Find Models to Work With

Making the step from working with friends and family, to photographing clients, through to working with models are big steps in a photographers career. They are also challenging steps unless you have a network of appropriate people to shoot with. This post – How to Find Models to Work With – details ways for you to source models for your shoot.
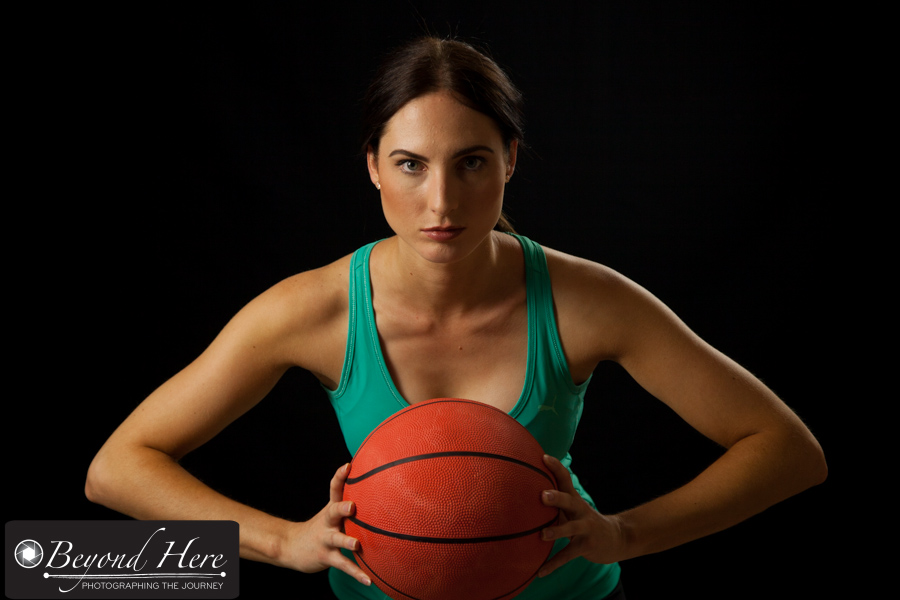
basketball

Facebook groups and specialist sites are great places to connect with other creatives

Facebook. If you are a Facebook user and live in a place with a reasonable population, there is likely to already be a Facebook group set up which will help you.


As I’m writing this post I’ve gone to the Facebook search field and entered “Sydney models” and it has proposed a series of relevant groups.

As I scan down them I can see one called ‘Sydney Models / Photographers / HMUA’ which currently has 3716 members. So what is this? It is a group of models, photographers, and hair and make up artists (HMUA) who participate together in the group.

They make requests for relevant services, share work, put forward their name for shoots, and use the Facebook group as a place to find other creatives to work with.

Specialist Sites. There are also specialist web sites which create communities of creatives. The two that I am most familiar with are Model Mayhem and StarNow. Go ahead and check them out. It is free to set up a profile on each of them, and like the Facebook groups, they are a place for creatives to come together.

How should a photographer use these communities? Start by setting up a profile and include details of what you are looking for from people visiting your profile. I am a stock photographer, so my profile includes details to let people know the projects I am working on, and the type of creatives I would like to contact me.

Secondly, there is the opportunity to share your work. Add images to your profile so visitors can assess the style and quality of your work.

Thirdly, each of these communities have the ability to post a ‘casting call’. That is, you put forward details of your shoot, and ask people who are interested to get in contact with you.

Pilot

Include all relevant information in your casting call to help get qualified responses

What information should you include in a casting call? The short answer is – as much information as possible. Consider these points as a minimum:

  • when is the shoot? Include the date and time
  • where is the shoot? Be specific. A suburb is better than just the city name.
  • how long do you anticipate the shoot will go for?
  • is it indoor or outdoor? Studio or natural light?
  • is the shoot paid or TFP (time for print, or time for portfolio)?
  • what is the shoot concept?
  • what special requirements do you have? (for example, if you are looking for a model of specific cultural background and with long hair, be sure to specify that in the casting call)
  • who is doing hair and makeup? A HMUA? or do you want the model to do their own?

If you were not sure how to find models to work with, I hope this post has helped you.

If you already use these sites or others, what is your experience? Which sites generate the best response for you?

Thanks for reading – how to find models to shoot with. Happy shooting.

Starting Out With Light Modifiers

Many readers of Beyond Here are wanting to take the step into the professional photography ranks. They are looking to make photography a significant part of their income, and then make it their main source of income. Making that leap often means learning the skills and having the equipment to shoot multiple days of the week and in different lighting conditions. In many cases this will bring an ‘outdoor’ photographer indoor where they will need a range of lighting equipment, and the skills to use them. In this post we look at starting out with light modifiers. Here is an overview of the basic equipment.

Portrait

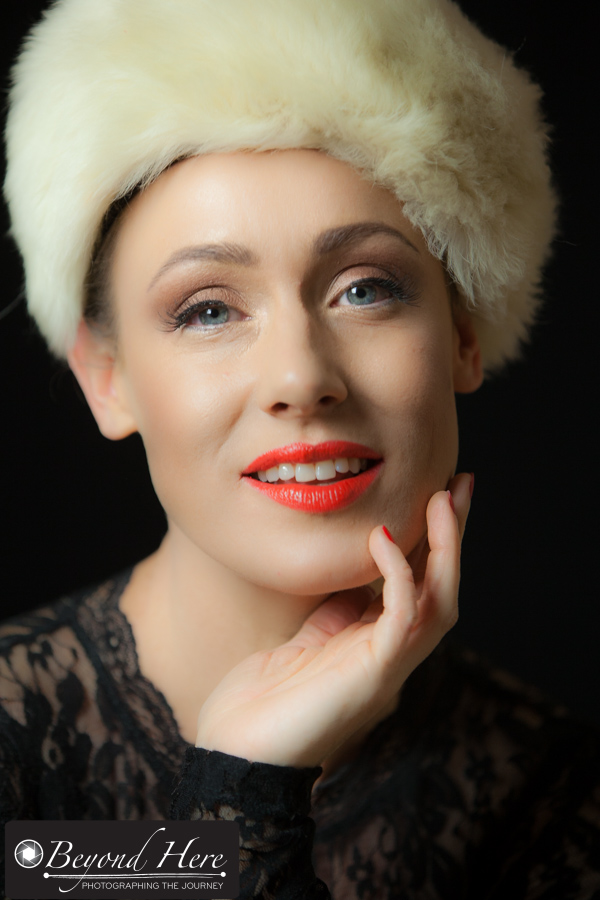
This image was shot with a single soft box to the left of camera

Reflector – a reflector is a very simple piece of equipment. They are straightforward to use and simply reflect the existing light. They come in silver and gold which create different levels of ‘warmth’ in the light. Reflectors come in a range of sizes and are cheap and worth having.

Diffuser

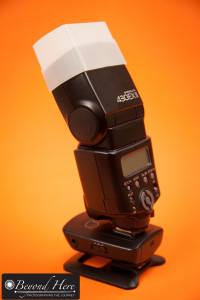
The simplest light modifier is a diffuser for a speedlite

Speedlite Diffuser – a speedlite diffuser is the most basic type of light modifier. They come in various forms, but the most simple is a piece of plastic which fits over the head of the speedlite. They are surprisingly effective in softening the light from your speedlite. They are very cheap and worth getting. The speedlite shown in the diagram is being used off camera. If you have never used your speedlite off camera, please see this post. Learning to use your speedlite off camera and softening the light will open up a new world of lighting opportunities for you.

Reflective Umbrella – umbrellas are ideal for creating soft light across a large area, which makes them useful for lighting groups of people. They are cheap and easy to use. The only disadvantage is that they tend to spread lots of light around. Like the reflector, reflective umbrellas come in different colors – silver, gold and white.

Shoot through umbrella

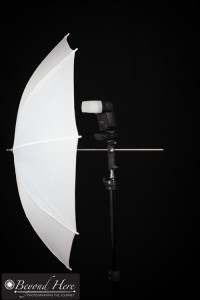
A simple set up for a speedlite to be fired through a shoot through umbrella

White Shoot Through Umbrella – shoot through umbrellas are great for diffusing light and spreading it evenly. They are simple to use, and as the name implies, you shoot the light through the translucent umbrella. They come in different sizes, so keep in mind that the light will be softer when coming from a larger source. Shoot through umbrellas and reflective umbrellas are very easy to use in an indoor environment. An example is in this post. Be very wary of using umbrellas outdoor. Even a very small gust of wind will catch the umbrella and blow your equipment over.

Scrims – a scrim is a square or rectangular frame with diffusion fabric spread across it. They are typically larger than umbrellas and can be used to create large areas of diffused light. Use a scrim to diffuse light from flash, continuous lights, or the sun.

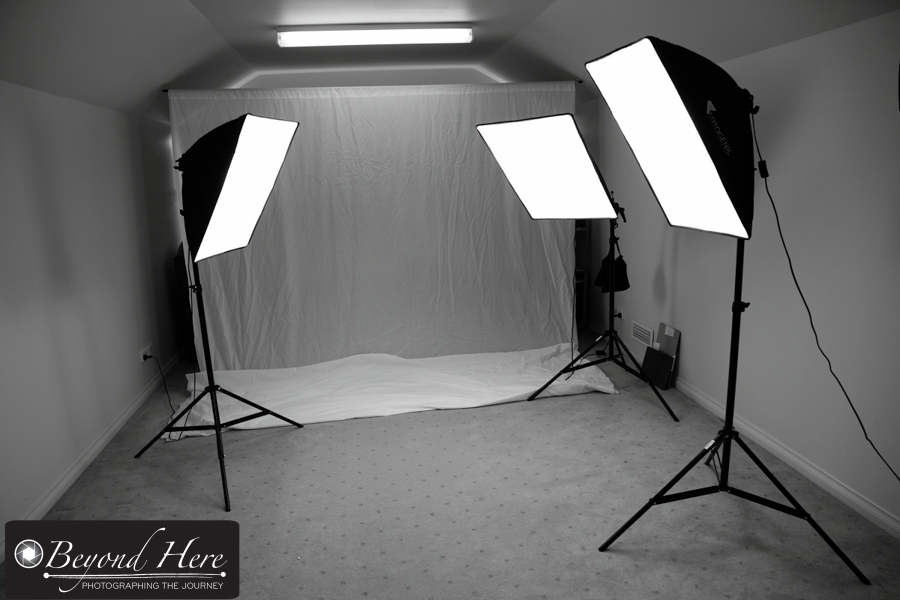
Soft box – soft boxes give the photographer more control of light than umbrellas. Soft boxes are what I use most frequently in the studio environment. They are simple to use and avoid light spreading everywhere in the studio environment. Soft boxes come in a range of different sizes from small to very large. Choose which is most appropriate for your lighting needs and your space.

Soft boxes

An example of soft boxes in a simple studio environment

That covers the very basics of starting out with light modifiers. This post only touches the surface of a large subject. I’ve done it without mentioning beauty dishes, gridspots, Fresnel lights, or an octabox! Thanks for reading starting out with light modifiers. I hope it has demystified light modifiers and given you the encouragement to begin modifying your light.

Why Photographers Should Keep Great Client Records

This month I have been working with a photographer who is running a successful family portrait business. She has been busy booking and shooting local family portraits very consistently for 18 months. It’s a good news story. She is enjoying creating images for local families and is running a healthy business. Right now she faces a slow down in her bookings, and has asked me to help. It has reminded me again why photographers should keep great client records.

To help her, together we have been working through each aspect of her business reviewing what is working, and what is not. Overall it is a very positive picture. She has been busy for 18 months and has a large group of happy clients.

Thinking About Clients

Thinking about clients? Good record keeping will helps generate new work from past clients.

In our discussion, her first question was ‘I’ve never had a slowdown in bookings before – how do I generate more clients?’ My response was – maybe you don’t need new clients. Maybe you just need to contact your old clients to see if you can help them again.

As an example, one of her first clients had a 4 year old and a new born child. It was the arrival of the baby that prompted the family to have the first portrait shoot. My suggestion was that she re-contact this client. The family’s 4 year old will be just over 5 now and is likely to be starting school – what a great time to do another family portrait session. And then we realized – the photographer hadn’t kept contact details for each client. She didn’t have a way to easily contact the family to explore a second shoot.

So that leads us to, why photographers should keep great client records. I have summarized it into 5 key reasons:

(1) Past clients should be future clients. If a client is happy with your service once, they are more likely to be your client again – but you need to have kept their contact details and relevant information. Only a small percentage of past clients will spontaneously contact you years after the original shoot. Collect relevant client information, so you can use it in future.

(2) Times change, but the photographer doesn’t need to. In family photography there is natural change as children grow up. If you have a client with a new born baby, it won’t be long until there are toddler pictures to shoot, birthday parties, and then shots as the child starts school. This progression continues through primary school and into high school. If you do it really well, you may end up shooting their high school graduation images, on to their wedding, and their own children. Think of your client as a relationship you will nurture, not as a one time ‘job’.

Baby in hat

In family photography, there is a natural on going demand for images as the child grows

(3) Clients will send you referrals – make it easy for them. All photographers find that happy clients send them referrals. This is easier for clients if you have kept in touch with them. I sure don’t want a client I worked with saying ‘we’re really happy with the images, but I can’t remember the name of the photographer’. Keeping good records helps you stay in touch. And staying in touch makes it easy for clients to send you referrals.

(4) Past clients are a great source of ‘short notice’ bookings. If you have an opening in your schedule for a shoot next week, past clients offer great potential to fill that gap. Here is the main part of an email I sent to a past client 4 weeks ago “Hi R, I hope you and P are going well. I have had a client cancel their session next Sunday, so I wondered if you would like to do a mini family shoot before the kids go back to school? My normal price is $XXX but as you are my existing client I can offer it to you for $YYY. If you are interested, we can do it in the park near your home. What do you think?” If you have kept your clients email and mobile phone details this is a fast, effective way to fill your calendar.

(5) Happy clients will write testimonials. Social media has made it very easy for word to spread quickly. As photographers offering a service to our clients we need to make the most of this. Keeping good client records makes it easy to ask for testimonials and feedback, which helps to generate more clients.

The photographer who asked for my help now has a system for recording client details and a plan for how and when to contact them. She came to me with a short term business problem, and now has a plan for long term success. I hope this has been helpful to you too, and that you understand why photographers should keep great client records.


Making This Image

I had a canvas print of this image on my studio wall before it went to the client. It drew lots of questions about how it was created. How did I make her hair go like that? How do you get a pure white background? Is that shape real? And lots more. Below I have outlined the steps in making this image.

Portrait Photography

Unique portraits like this one don’t need to be complex or very time consuming

Step 1 – Plaits. This young lady has very, very long hair. She is tall and it goes all the way down her back. Step 1 was to get her mum to plait it. I didn’t see this part, but it must have taken some time for such long hair!

Step 2 – Studio set up. This shot was taken in studio, against a white background. I have written an earlier post about how to get a pure white background. If you don’t have a studio backdrop you can achieve the same effect with a white wall or nearly white wall. I had two lights with small soft boxes on them positioned on left and right at 45 degrees to the subject. You can see the catch-lights from those in her eyes.

Step 3 – Shaping the hair. In this image, I was aiming for a fun / quirky image. To shape her hair – we improvised! We unwound a wire coat hangar and threaded it through the middle of her plait. That made it possible to create a range of different shapes from her plait. The coat hangar protruded out of her hair. In this image it protruded to the left, where her mother was holding it.

Step 4 – Removing the visible part of the coat hangar. In each of this small series of images, part of the coat hangar was visible. It stuck out from her hair, and out of frame where her mum was holding it. To remove the coat hangar wire from the image required less than 5 minutes in post production, using the stamp tool to replace the wire with pure white from the background.

It does not need a long tedious studio session and hours in post production to make interesting images. This one took about 20 minutes from beginning to end (after her hair was plaited!!) I hope this was helpful to you, and that you understand the process for making this image. Do you have a story to tell about making unique portraits?

Portrait Photography Tips Fill The Frame

Do you want to improve your portrait photography? An almost universal rule for taking more compelling portrait images is to fill the frame with your subject. That means getting closer to the subject (or zooming in closer) so that the subject entirely fills the frame.

It doesn’t matter whether the subject is people, animals, or objects – fill the frame with the subject for more interesting images. This can feel a little funny at first, particularly as you move in closer than you normally feel comfortable. Push through the discomfort – it will be worth it and your portrait photography will benefit.

I find the best way to do this is to stand much closer to the subject than you normally would. If you are feeling uncomfortable, like someone is in your personal space, then you are in the right spot.

Why does this work?

Filling the frame with your subject creates more compelling images because:

  • it focuses the viewer completely on the subject, and
  • it removes any distracting background elements

Show me an example!

Portait where the subject fills the frame

Portait where the subject fills the frame

Here is an example of a children’s portrait.

It was shot indoor, with a large glass window behind me. The window was not in direct sunlight, so it was producing very soft natural light across the subject. The room contained furniture and children’s toys. These are normal elements in a home with children but they have the potential to distract your viewer if you include them in your image.

In this case, although I was using a 24-105mm lens, I didn’t need to use the zoom right to the 105mm end of the range. I was close to the subject and managed to fill the frame completely with the subject. The result – a simple compelling portrait photograph (which doesn’t show the clutter and mess in the room around them.)

This is one of my favorite portrait photography tips.

How do you find standing close to the subject and filling the frame? Do you find it more effective to position yourself close to the subject, or a little further back with some zoom?