Category Archives: Sports

Photographing 4000 Athletes Over 3 Days

Last weekend I contributed to photographing the AASCF Winterfest event held at the Melbourne Sports and Aquatic Center. This is a cheer leading and dance event involving photographing 4000 athletes over 3 days. I posted about this job in Thoughts on Shooting for An Hourly Wage. Beforehand I hadn’t realized the scale of the event. There were 4000 athletes and 6000 spectators. This is how it worked.

AASCF staff access pass

Cheer and dance events are large scale. Winterfest involved photographing 4000 athletes over 3 days.

The Venue

MSAC was set up in 3 distinct arenas. One area acting as the cheer leading event hall. The second area (normally used for badminton) acting as the dance event hall. And the third area, which was normally used for basketball, was the warm up and presentation area. The stadium was looking very different to how I usually see it. Overall, it was well organised for photographing 4000 athletes over 3 days.


Photography and Videography

The Winterfest event is the first major competition in Victoria for the competitive season. There are a series of events to follow, including the State Championships in September, and the National Championships in November.

Teams are very keen to see video and photo coverage of their performance. They use them in training for upcoming events. Both photography and video are key to covering this event.

The Photography Set Up

Photography coverage was provided in the 2 event halls with photographers working in teams of two. One was shooting using a 24-70mm lens. This photographer was concentrating on shooting team images where all or most of the team were visible in the image. The other photographer was shooting using a 70-200mm lens. This photographer was concentrating on close up images of individual athletes.

Equipment

All photography equipment was provided by the national sports photography business I was shooting for. They are highly organised with each photographer having access to equipment and back ups.

As I started shooting each day I was provided with:

  • camera body and lens
  • back up camera body and lens
  • a bag of empty memory cards
  • a bag of fully charged batteries
  • separate bags to put full memory cards and used batteries
  • a pen and paper to record which teams and performances were on each memory card
  • a monopod
  • water
labelled bags

Photographers were provided with labelled bags for easy organisation

Managing High Image Volumes

A performance routine lasted 2 minutes and 30 seconds. For each performance both photographers will shoot 200-300 images. As a result, between the two photographers that means there were 400-600 images per performance.

At the end of each performance there was a break for 3 minutes and 30 seconds for the athletes to move off the stage, and the new athletes to enter. That means there were 10 performances per hour or 4000-6000 images shot per hour on each of the two event floors.

That’s a lot of images. To make this manageable, we were shooting small JPEG files. We began the day setting white balance in camera, and then shooting images at f3.2 and 1/800 second.

Essentially there is no post production. The sports photography company will select the best images from each performance and post those to the event folder online.

winterfest

Apologies for the blurry phone photo! This is the performance area for the Cheer Leading.

Comments

I found it fascinating how the national sports photography business managed photographing 4000 athletes over 3 days. What now? The event finished on Sunday evening. They are expecting to have all the photos and videos sorted, organised and posted online by the end of this week. Very impressive! If you are interested in learning more about cheer leading and dance, or checking out the images, please visit the AASCF website.

Thoughts on Shooting for an Hourly Wage

Next weekend I will be shooting a Cheer Leading and Dance Competition for a national sports photography business. This has come about after I photographed the Australian National Gymnastics Championships and, via a series of circumstances, was put in touch with the sports photography business. They saw my gymnastics images and asked me to shoot for them at the cheer leading and dance competition. For this ‘job’ I’ll be paid an hourly rate, while the sports photography business will do all client liaison and post production. That’s very different for me, and has lead me to consider my thoughts on shooting for an hourly wage.

Gymnastics

This opportunity has come after I photographed the Australian National Gymnastics Championships.

How’s the Event Photography Going to Work?

Cheer leading is a fast paced, action, team sport. The event will be held at a major indoor venue in Melbourne, Australia (Melbourne Sports and Aquatic Centre). I’m familiar with the venue as I’ve shot basketball there.

Each performance will be covered by two photographers positioned at different points inside the stadium. One will use a 24-70mm lens to ensure coverage of the team formations, while the other photographer will shoot close ups using a 70-200mm lens.

Who Provides the Gear?

The sports photography business provide all the equipment – including cameras, lenses and memory cards. It’s going to be strange for me to shoot an event using someone else’s gear! I’m glad that they are using Canon equipment as I’m a Canon user and will be familiar with the cameras and lenses.

So  what are my thoughts on shooting for an hourly wage?

Camera and lens

The sports photography company will provide all equipment.

The Pros of Shooting for an Hourly Wage

I can think of lots of pros for doing this job. In brief, the main pros I see are:

  • there’s no risk. I know exactly the financial return before I shoot the job.
  • my focus can be on creating strong images as there’s no client liaison to do. I enjoy getting to know my clients and to understand what they want. I also enjoy being able to focus on creating strong images. It is going to be refreshing to focus solely on creating strong images next weekend.
  • there’s no post production involved. I generally don’t mind post production work, but it is time consuming and often brain-numbing! I am really looking forward to being able to enjoy the event and hand over the images to the sports photography company to do the post production work.
  • payment will be prompt. The sports photography business pay photographers within 7 days. I have certainty about income, and payment will be prompt.
  • doing a good job will lead to more events. Like everyone, the sports photography company wants good people working for them. I know that a job well done will lead to more events in future.
Australian money

The sports photography business are taking all the risk. I have certainty about income, but won’t make a lot from this job.

The Cons of Shooting for an Hourly Wage

Everything has pros and cons, and I can see cons to this job too. They include:

  • I won’t make much money. While I’m expecting it to be straight forward, the hourly rate is not high. The sports photography company are taking the risk and will also reap the reward of a job well done.
  • I don’t make any extra for doing a great job. In my normal client work a great job will lead to more prints or albums. That will lead to extra income. In next weekend’s event income is fixed regardless of the standard of the images.
  • This work is irregular. This weekend is good timing for me. It’s mid winter and my wedding work is quiet. I know that if I do a good job there will be opportunity to photograph other events. I also know these events are irregular and generally on weekends. That’s not always going to suit.
Female gymnast doing floor routine

I will be focusing on creating strong images

Summary Thoughts on Shooting for an Hourly Wage

I’m looking forward to being able to just concentrate on creating strong images and let the sports photography business worry about everything else. I don’t think I could do this type of work all the time as I would miss the clients liaison and the financial upside of doing a great job.

That said, I can see the benefit of doing this work to supplement my usual income sources. I’m expecting it to be a lot of fun and a relatively low stress job. I’d like to shoot this type of event during the quieter times of the year.

So for now, I see it as a useful additional income to my business. I’ll be doing my best to shoot strong images so that the sports photography business ask me to shoot for them again.

Do you do shoots like this? What are your thoughts on shooting for an hourly wage?

5 More Lessons From Photographing Gymnastics

Coming hot on the heels of 5 Lessons from Photographing Gymnastics – here are 5 more lessons from photographing gymnastics. I learned these while shooting the Australian Gymnastics Championships in Melbourne, and hope you can use these in your own sports photography. So, what’s first in 5 more lessons from photographing gymnastics?

hand stand

Look to photograph specific skills on each apparatus

Lesson 6 – Look to Photograph ‘Skill Execution’

Gymnasts learn different skills at different levels of gymnastics. As an athlete progresses up the levels they can execute more difficult activities. Among the high speed action of gymnastics championships are specific skills. Look to shoot these skills as they are meaningful to gymnasts, coaches, and gymnastics fans.

Lesson 7 – Photograph the Details Outside of the Competitive Performance

In a gymnastics competition there are lot of opportunities to shoot elements of the event outside of the actual competitive performance.

This is where a photographer can shoot very unique content. All photographers will shoot the spectacular tumbling runs in the floor routine, but it is the unique details around the competition which will make your coverage of the event stand out.

Gymnastics bar routine

Gymnast preparing for her bar routine with chalk on her hands

There are opportunities to shoot content where:

  • the athlete is preparing to compete
  • you capture the emotion after a gymnast has completed the routine
  • there is interaction between gymnast and coach
  • there is interaction between gymnasts

Look out for these opportunities to shoot unique content. It is this detail that spectators can’t see from their seat in the grandstand.

Lesson 8 – Shoot Bursts at Fast Shutter Speeds to Freeze the Moment

Below is a unique image where I’ve managed to create the illusion of a headless gymnast! This was taken during the floor routine during one of the gymnasts tumbling runs. If you look carefully you’ll see that the gymnasts head is not visible except for a tiny part of her chin. This kind of image is unique as you can’t see this with the naked eye.

lay out flip

This image captures an illusion of a headless gymnast

Your best chance to achieve this type of shot is with high ISO, fast shutter speeds, and shooting in burst mode. When I looked at this image on the back of my camera during the event and was amazed to see the illusion of the headless gymnast. I thought that was very unique – but then managed to produce the same type of image with different gymnasts. And the more I studied their floor routines, the higher my chance of recreating this shot.

Pay attention to what the athletes are doing, and then shoot in burst mode at fast shutter speeds.

Lesson 9 – Use Different Backgrounds to Create Different Effects

The spectators sat on the sides of the main gymnastics floor which meant it was straightforward to shoot images with the crowd in the background. I like that style of image as the presence of the crowd helps define this event as the national championships not a local club event.

Gymnastics bars routine

The black curtains at the end of the gymnastics floor enabled me to shoot a different style of image

At the ends of the gymnastics floor were large black curtains to separate the warm up area from the main arena. I hadn’t expected to be able to isolate the gymnast against plain backgrounds like this. It was fun creating different styles of images against different backgrounds.

Lesson 9 of my 5 more lessons from photographing gymnastics is to use different backgrounds to create different images. Is this something you can use in your sports photography?

Lesson 10 – Use Different Angles to Isolate Action

This image was shot during the warm up phase with athletes and coaches behind the apparatus waiting for their turn. I shot a range of images where the other people were visible in the image – it documented the event as it happened.

beam routine

Getting a low angle enables me to isolate the gymnast against the background during warm up

I then experimented with different angles and lenses to create different styles of images. I like this low angle perspective. We have no distracting people in the background. What are we left with? An athlete doing her warm up, isolated against a plain black background. What the spectators saw from the stands was a lot of activity on the floor. What I saw in this image was like the athletes perspective – oblivious to all the activity around them and focused on their own performance.

Experiment with angles to create different images.

Thanks for reading 5 more lessons from photographing gymnastics. I hope you can apply them to your own sports photography. If you’d like to learn more about gymnastics check out the Gymnastics Australia website.

5 Lessons From Photographing Gymnastics

I recently had the opportunity to photograph the Australian Gymnastics Championships at Hisense Arena in Melbourne. I have shot a lot of basketball and netball over the last 5 years, but the chance to photograph gymnastics was something new. It is refreshing to shoot something new, like I posted about in Fresh Perspectives on My Hometown. Before the championships I studied gymnastics photos, and then had a great time at the event. I learned a lot about gymnastics photography too. I have 10 lessons which I will share over two posts. So first, here are 5 lessons from photographing gymnastics.

Gymnast doing split leap

Gymnasts combination of athleticism, flexibility and strength produces images not seen in other sports

Lesson 1 – Gymnasts Athleticism, Flexibility and Strength leads to Unique Images

As this was the Australian national championships the standard was very high. The athletes have typically spent 10 years or more training to achieve this level. That means they are great athletes able to execute difficult gymnastics skills. I’m not sure why that surprised me (!) but the gymnasts had a tremendous combination of strength, flexibility and balance. That lead to a range of unique images which aren’t present in other sports. You’ll see examples in the images on this post.

Lesson 2 – Lighting can be Challenging

Like in any indoor sport relying on artificial light, the level of lighting can be problematic for a photographer. I was fortunate that this venue is a world class venue with good lighting. That said, because the action was fast moving, I was still shooting with ISO between 1000 and 2000 to keep shutter speeds at 1/1600s or faster.

Lesson 3 – Warm Up Provides Additional Photo Opportunities

I was fortunate to be guided by one of the athlete’s families about gymnastics images. These athletes have typically competed in a range of state and national championships most of which have photographers covering the event. Those photographers typically focus on the actual competition.

Gymnastics beam routine

This warm up session on the beam provided a unique opportunity to shoot against a black background

Lesson 3 from my 5 lessons from photographing gymnastics was not to overlook the warm up. It is a key part of the event for gymnasts and is rarely covered by photographers. Look for opportunities to shoot the warm up as well as the competition.

Lesson 4 – Prepare your Equipment for Fast Moving Action

Lesson 4 is obvious to gymnastics experts! The action is very fast moving. I have shot a lot of basketball in poorly lit stadiums, but I hadn’t appreciated that the action in gymnastics would be much faster than a typical basketball game. While a basketball game might have fast and slow elements to the game, there really aren’t any slower tempo parts to gymnastics. There is plenty of time preparing, but once the athlete is going it is very quick.

To freeze that action you need equipment which will let you focus quickly and shoot at fast shutter speeds. I mainly shot at f2.8 to keep shutter speeds above 1/1600s. Prepare your equipment with the fast speed in mind.

Lesson 5 – Floor Routine is Where Gymnasts Really Express Their Individuality

I was covering the women’s artistic gymnastics competition. That involves 4 different apparatus – the vault, uneven bars, beam, and floor routine. Within all of those, a gymnast has the opportunity to both execute the skills and express their personality. That said, it is the floor routine where they have the greatest opportunity to express themselves.

Gymnast floor routine

The gymnasts can really express their personality in the floor routine

How does this impact images you’ll shoot? Extensive planning has gone into all elements of the floor routine, so gymnasts are just as interested in the expressive poses as they are in the spectacular leaps. Don’t overlook these moments to capture images which are unique to that gymnast.

Thanks for reading 5 lessons from photographing gymnastics. I’ll follow up with 5 more tips in a separate post. Just before I wrap up this post, if you are a photographer in Australia look out for the national championships dates and venue on the Gymnastics Australia website. It was an excellent event which I would recommend to other photographers. Thanks again for reading 5 lessons from photographing gymnastics. Happy shooting!

Shooting Moving Objects

Over the last 2 months I have been working with 5 other photographers to build a new image library. I didn’t know the photographers before we started the project, and it has been fun and challenging to work with them. One area that has become clear is that there is room for improvement in shooting moving objects. I have ‘grown up’ shooting sports and wildlife and selling prints. In that environment the images have to be in sharp focus. The 5 photographers are all younger than me and have ‘grown up’ in the era of Facebook and Instagram where there is less importance on fundamentals like having the image in really sharp focus. So here are a few pointers for shooting moving objects.

Focus Mode and Focus Point

Below is a straightforward lifestyle image of a woman walking across the road. This image can be very boring if she is standing still. Having her moving adds an energy to the image. So how do we maximize the chance of having her in sharp focus? Firstly we shoot in continuous focusing mode. I use Canon equipment, so on my Canon camera bodies that is AI Servo mode.

woman walking

Use continuous focus mode and a single focus point to maximize your chance of a sharply focused image

Choose a single focus point to tell your camera where the focus should be. In this case I pre-selected this point before we walked across the road, and I aimed it at the model’s eye closest to the camera.

Shutter Speed, ISO, and Depth of Field

For the shot above I wanted to blur the people in the background so I shot at f2.8. It was an overcast but bright morning, so I used ISO400. I knew at this ISO and f2.8 it would mean I could keep a fast shutter speed which again helps keep sharp focus in the image. The shutter speed in this image was 1/1600s.

In older DSLR bodies I would be very careful about raising the ISO as it would result in grain in the image. But with modern DSLR’s this is not a concern, and is not a consideration at ISO400.

What Shutter Speeds Should You Work With?

The answer to this question is to practice extensively. I know from taking thousands of images of moving objects what shutter speeds maximize the chance of a sharply focused image.

Of course the speed the object is moving has an impact on what shutter speed you will need. Again, from experience, I know that in the case of the image above any shutter speed at 1/400s or faster will give me a good chance of a sharply focused image.

Woman crossing

An image like this will have greatest chance of being in sharp focus if you shoot at 1/400s or faster

In the case of kids sport – I have shot many basketball games and know that 1/800s might not give me sharply focused images when the kids are running at full speed. At 1/1000s or faster I have a much better chance.

And for fast moving wildlife like the grey headed flying fox below, I’ll be aiming to shoot at 1/1600s or faster.

Shoot A Single Frame or Multiple Frames?

Like everything in photography (!) the answer is up to you. I like to shoot multiple images to give me choice among the images and as ‘insurance’ if one shot is out of focus. I shoot images of fast moving objects in burst mode and shoot 3 or 4 images each time.

Flying fox

This image was shot at 1/2000s to freeze the action of this fast moving flying fox. It was shot in burst mode.

If you are serious about your photography and committed to producing sharply focused images you’ll need to master shooting moving objects. Think for a moment about the possible scenarios – sports, live music, lifestyle portraits, stock, wildlife, wedding, events. The list goes on. If you can’t shoot moving objects well you are going to significantly reduce the options for earning money from your photography work.

I hope these quick pointers will help you with shooting moving objects. Next step – lots of practice! Happy shooting.

How to Find Models to Work With

Making the step from working with friends and family, to photographing clients, through to working with models are big steps in a photographers career. They are also challenging steps unless you have a network of appropriate people to shoot with. This post – How to Find Models to Work With – details ways for you to source models for your shoot.

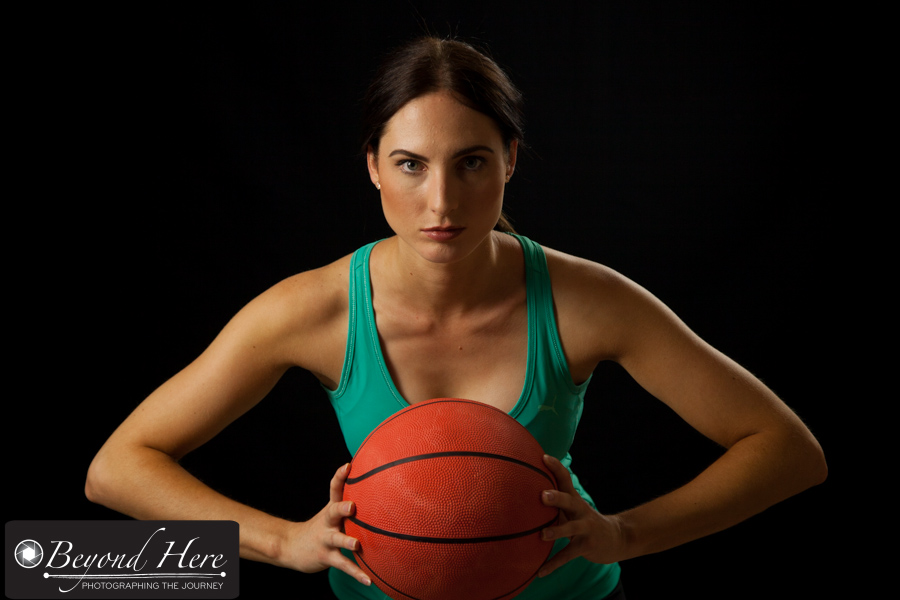
basketball

Facebook groups and specialist sites are great places to connect with other creatives

Facebook. If you are a Facebook user and live in a place with a reasonable population, there is likely to already be a Facebook group set up which will help you.

As I’m writing this post I’ve gone to the Facebook search field and entered “Sydney models” and it has proposed a series of relevant groups.

As I scan down them I can see one called ‘Sydney Models / Photographers / HMUA’ which currently has 3716 members. So what is this? It is a group of models, photographers, and hair and make up artists (HMUA) who participate together in the group.

They make requests for relevant services, share work, put forward their name for shoots, and use the Facebook group as a place to find other creatives to work with.

Specialist Sites. There are also specialist web sites which create communities of creatives. The two that I am most familiar with are Model Mayhem and StarNow. Go ahead and check them out. It is free to set up a profile on each of them, and like the Facebook groups, they are a place for creatives to come together.

How should a photographer use these communities? Start by setting up a profile and include details of what you are looking for from people visiting your profile. I am a stock photographer, so my profile includes details to let people know the projects I am working on, and the type of creatives I would like to contact me.

Secondly, there is the opportunity to share your work. Add images to your profile so visitors can assess the style and quality of your work.

Thirdly, each of these communities have the ability to post a ‘casting call’. That is, you put forward details of your shoot, and ask people who are interested to get in contact with you.

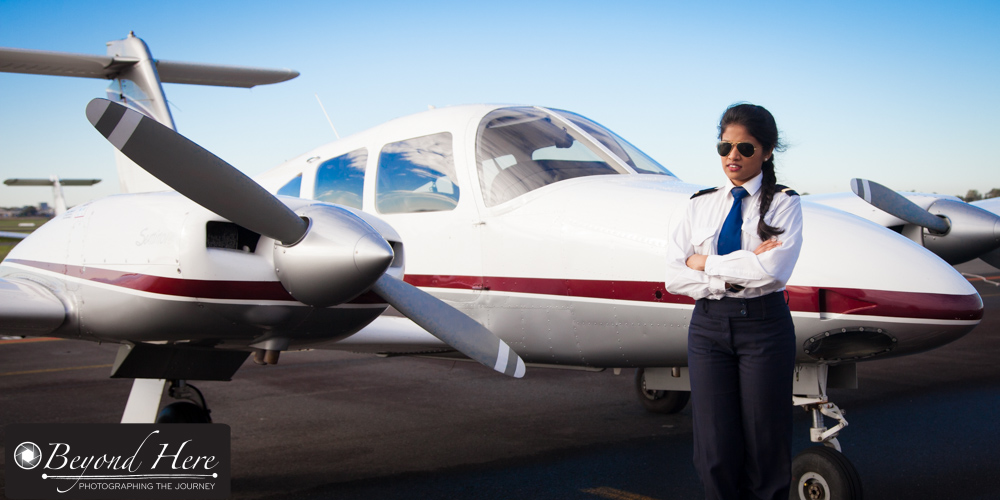
Pilot

Include all relevant information in your casting call to help get qualified responses

What information should you include in a casting call? The short answer is – as much information as possible. Consider these points as a minimum:

  • when is the shoot? Include the date and time
  • where is the shoot? Be specific. A suburb is better than just the city name.
  • how long do you anticipate the shoot will go for?
  • is it indoor or outdoor? Studio or natural light?
  • is the shoot paid or TFP (time for print, or time for portfolio)?
  • what is the shoot concept?
  • what special requirements do you have? (for example, if you are looking for a model of specific cultural background and with long hair, be sure to specify that in the casting call)
  • who is doing hair and makeup? A HMUA? or do you want the model to do their own?

If you were not sure how to find models to work with, I hope this post has helped you.

If you already use these sites or others, what is your experience? Which sites generate the best response for you?

Thanks for reading – how to find models to shoot with. Happy shooting.

Freezing Motion

Freezing motion is a photographic technique to capture what the human eye cannot see. It is particularly effective in wildlife and sports photography. So what do we need to do to freeze motion, and how can we use this?

To be effective in freezing motion we need to use a fast shutter speed. To achieve this we may need to use a high ISO depending on the lighting conditions. How fast does the shutter speed need to be? That depends on how quickly the subject is moving. Let’s look at some examples of freezing motion.

Freezing motion

Freezing motion in indoor lighting conditions will require higher ISO

Indoor sporting settings are particularly challenging for freezing motion. The low levels of lighting will mean higher ISO settings are required to get fast shutter speeds. In this image the settings are ISO4000, 1/500s, f2.8

In this case the player has just set off from a standing start. For this shot 1/500s has been fast enough to freeze the action. If he was running full speed we would need a shutter speed of 1/1000s or faster to freeze the motion.

Black swan

Freezing motion is very effective in wildlife photography

Example two is a black swan. This image was taken at Albert Park Lake in Melbourne, Australia. The outdoor setting and brighter lighting means we can use lower ISO, though we still need fast shutter speeds to freeze the action. In this case the settings were ISO100, 1/1600s, f2.8.

The bright sunny conditions means I have been able to use ISO100 and 1/1600s to freeze the action. Smaller, faster wildlife will require fast shutter speeds than these. To achieve focus, I have selected a single focus point and focused on the swan’s head. In the sports examples, I have used the same technique. Choose a single focus point and focus on the player’s head.

Freezing motion

Freezing motion in sport is straightforward in well lit conditions

In example three we have a player running towards first base. The brightly lit outdoor conditions mean we can achieve fast shutter speeds with lower ISO’s. In this case the ISO is 200 and the settings 1/1000s and f4.5. Again, for faster moving subjects, higher shutter speeds will be required.

How might we use the techniques for freezing motion? The sports examples show you that action images are no longer reserved only for professional sports people. With today’s camera technology and these techniques it is possible to create action portraits in local, amateur sports too.

In example four, we have a cassowary. These very large, impressive, flightless birds are difficult to photograph. Being ready with the techniques outlined in this post, meant that when this cassowary moved its head in an unusual way, I was ready to capture a unique portrait. In this case the settings were ISO500, 1/200s, f2.8. The slower shutter speed was effective here because these large birds move relatively slowly (except when they are running!!)

Cassowary

Be ready with a fast shutter speed, and a single focus point

For success in freezing motion, keep your shutter speeds high, and use a single focus point. 1/500s will work successfully for larger, slower moving subjects – and 1/1600s and faster for smaller faster moving subjects.