Many of the posts on Beyond Here refer to the benefits of stock photography as a part of a professional photographers total income. It is also a great place to start for people who want to become professional photographers. That is how I got started. Perhaps you are working on your camera skills? Or you are still refining your workflow? Or perfecting your post production skills? Or building your experience? Stock photography is a great way to build a portfolio and generate an income while you are perfecting your craft.
Getting started in stock photography can be daunting which is why I have written posts to help photographers get going. Please see Starting in Stock Photography, Simple Stock Concepts and Why Stock Photographers Should Crash Their Cars.
I regularly get asked about how to set up a stock photography shoot. So here I run through the process from my most recent shoot. I’ll cover everything from planning to completion, in a step by step guide to a studio stock photo shoot.
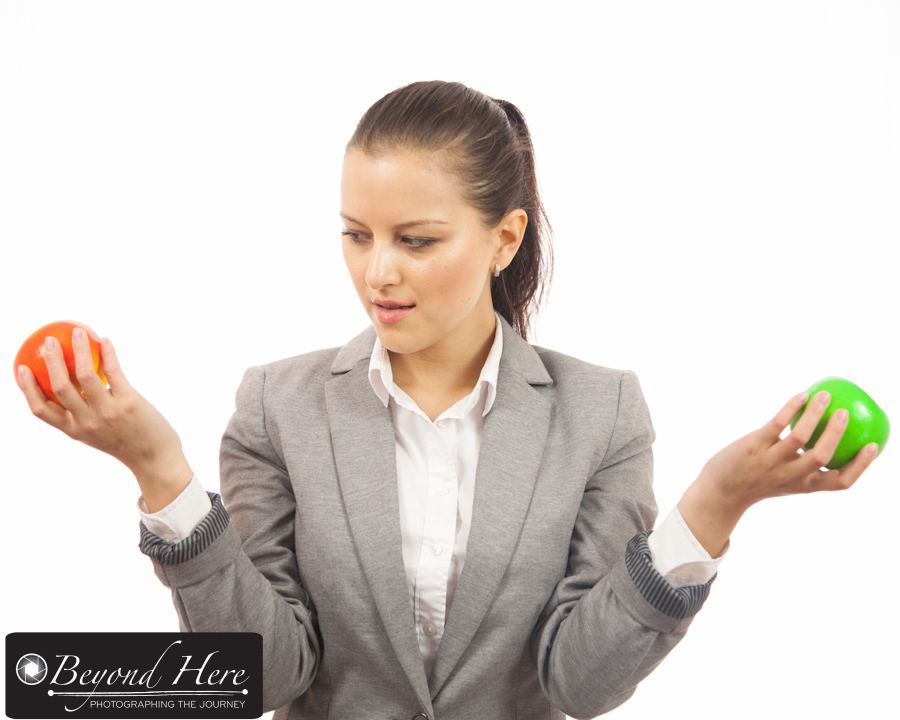
Simple props can help communicate themes in stock photography. This image concept is business choices.
Step 1 – Develop a Theme. To prepare for your stock photo shoot you need to first develop a theme. I am working on an extended series for my iStockphoto portfolio around ‘women in business’. It is a very large market – and also a very competitive one. For this shoot, I focused on shooting a series of corporate business woman images – the concept can work for people looking for images of female entrepreneurs, executives, business coaches, corporate regulators, I’m sure you get the idea. One of the advantages of shooting stock images like these are that they are very flexible and have multiple potential uses.

To find a model, have a look at ModelMayhem or a Facebook group.
Step 2 – Find Your Model/s. Now that you have a theme, you need to find a model. This is easier than you think. If you do not know someone who has the look you need, there are places to find people interested in stock photo work. Two good sources are ModelMayhem or Facebook groups in your area. I live in Melbourne, Australia and there is a very active Facebook group called ‘Melbourne Models and Photographers’. Check whether your area has a similar group. Write a brief of the requirements and ask for expressions of interest.
Step 3 – Put Together Sample Images. To enable you to prepare well, the next step is to put together a series of sample images. I do this to help me clarify the style of image I want to create, and to share that vision with the model. For this shoot, I emailed a link to the model who was then able to view the sample images and understand what was required for the shoot. This included the type of wardrobe to bring, and the appropriate style for hair and makeup.
Step 4 – Organize the Shoot Details. This step is being clear on the logistics of the shoot. For this shoot we organised a morning shoot to start at 9am and finish at 10.30am. Be sure to be clear with the model on the time, location, and any additional details – like parking or transport. I also like to confirm in writing the timings, and the requirements for wardrobe, hair and makeup.
Step 5 – Prepare Equipment in Advance. Step 5 is to prepare the equipment for your shoot in advance. At the time of your shoot, you want to be able to maximize your shooting time, so you need to be ready in advance. This includes having your studio space clean and tidy, lights set up, camera batteries charged, memory cards cleared and ready to go, and lenses on hand if you plan to change lens during the shoot. For this shot I used the 70-200mm and 24-105mm lenses. They were both cleaned in advanced and placed close to the shooting area so I could change them easily. I use a range of props to help communicate different themes. I place these on a table near the shooting area so they are readily accessible, and enable me to move quickly between different themes without interrupting the flow of the shoot.

Different wardrobe can help you produce a broader range of images.
Step 6 – Brief the Model. Briefing the model is important to make sure the photographer and the model have a common understanding. To do this, the photographer needs to be clear on what they intend from the shoot.
Avoid the ‘get in front of the camera and we’ll see what happens’ approach. This is not likely to produce the results you are looking for.
For this shoot, the model and I swapped email before the shoot to clarify the requirements. Then I printed the sample images and we went through them together before we began shooting. Twice during the shoot we stopped for a break for us to check the sample images to confirm our understanding of the style of images we were trying to create. Take time to brief the model. You can’t assume the good ideas in your head have been understood by the model if you haven’t taken time to discuss them.

Use different emotions to communicate your message
Step 7 – Conduct the Shoot. Thorough preparation through steps 1-6 should make sure your shoot goes well. In this case the shoot was a 90 minute shoot in a studio environment. By using different props and wardrobe we were able to shoot a range of different images in a short space of time.
When you are shooting, keep in mind that not every shot has to be a happy, smiling shot with the model looking directly at camera.
There is a large market for all sorts of different emotions communicated through the image. There is a place for the happy, confident image. There is also a place for sad, depressed, bored, stressed, anxious images. Speak with your model to make sure you develop a range of images from the shooting time.

Don’t overlook the importance of appropriate keywords.
Step 8 – Edit and Upload Images. As a stock photographer, having an efficient work flow is very important. I typically like to have all images from the shoot reviewed, edited and uploaded within a week of the shoot, and when possible, before my next shoot. I find that working promptly through the editing and uploading process helps my workflow by getting through to the end of the project promptly and letting me get on to the next idea.
If you have done a good job on steps 1-7 this work can be undone if you don’t use appropriate keywords for your image. Keywords are how you image will be found by potential buyers. Don’t overlook the importance of keywording as part of your editing and uploading process.
For the image shown here the keywords I use are – business woman, corporate business, female, one person, caucasian, business suit, arms folded, brown hair, adult, white collar worker, professional occupation, smiling, expressing positivity, studio shot, vertical, isolated, isolated on white, young adult, business person, business, waist up, brown eyes, looking at camera, white background.

Remember to provide feedback to your partners at the end of the shoot.
Step 9 – Feedback. Producing stock images is a collaborative effort. In this shoot it was between the photographer and the model. In other shoots there may be more than one model, a hair and makeup artist, and a stylist.
Step 9 is about providing feedback to your partners in the shoot. It is important to close out the shoot with feedback on what has gone well and what could be better, and to seek that feedback for yourself.
From this shoot I provided a link to the images in my stock photography portfolio so that the model could see the final product. It is important to me that the model sees them, as she did a very good job and I would like to shoot other stock concepts with her. Don’t overlook Step 9 – provide feedback to your partners.
Thanks for reading a step by step guide to a studio stock photo shoot. I hope this has been useful in describing the steps in a stock photo shoot, and will help your shoots to run smoothly.